First Task Walkthrough
Your First Real Task
This guide walks you through a complete task. Follow along with your first real task, or read it before you start.
Already know the basics? This is more detailed than the 5-Minute Quick Start.
Part 1: Getting the Task
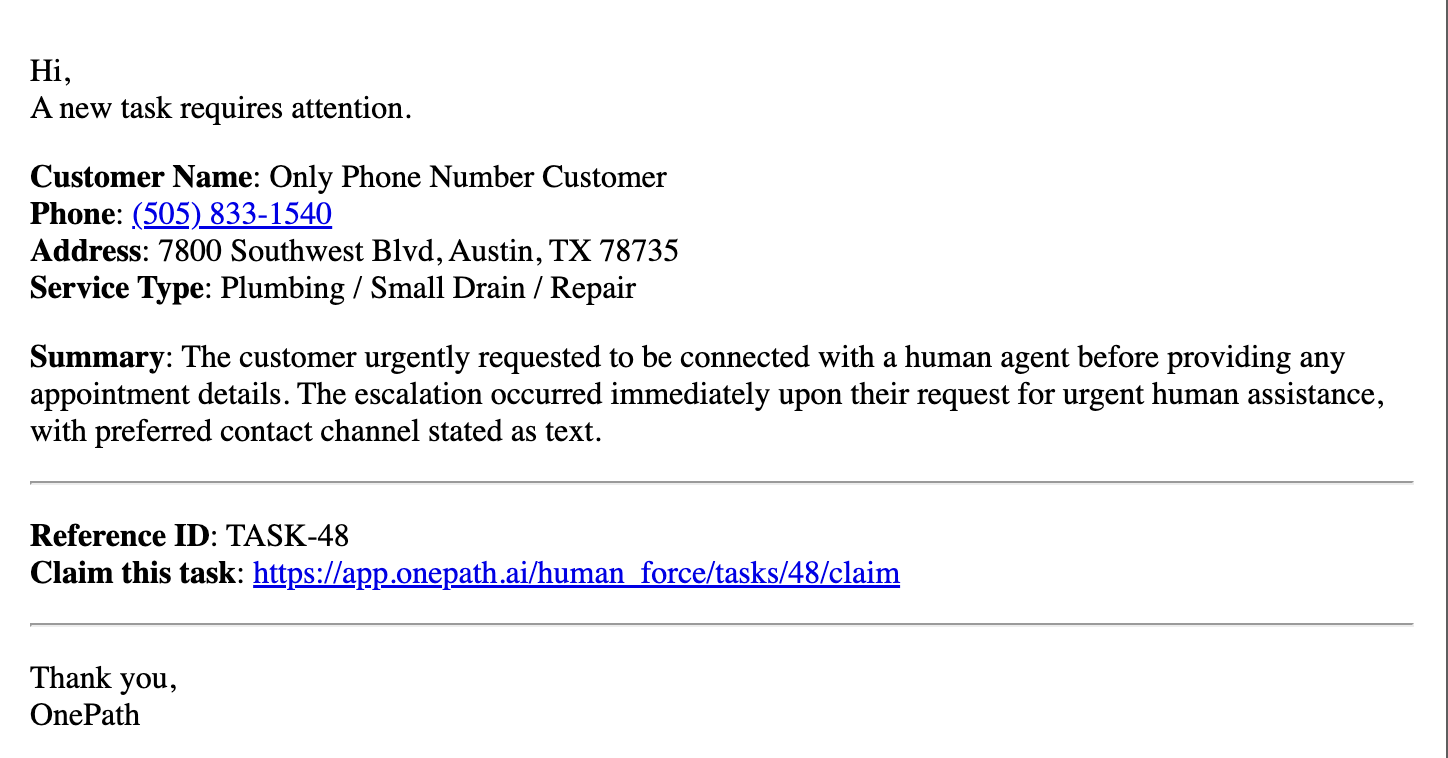
You Get an Email
Five9 sends you an email when a task needs attention.
Subject: "A new task requires attention"
The email shows:
- Customer name and phone number
- Address
- What service they need
- A summary of their request
- A link to claim the task
Click the Link
Click the link in the email. You'll land on the task page.
Important: You must be logged into HumanForce first. If you're not logged in, log in and click the email link again.
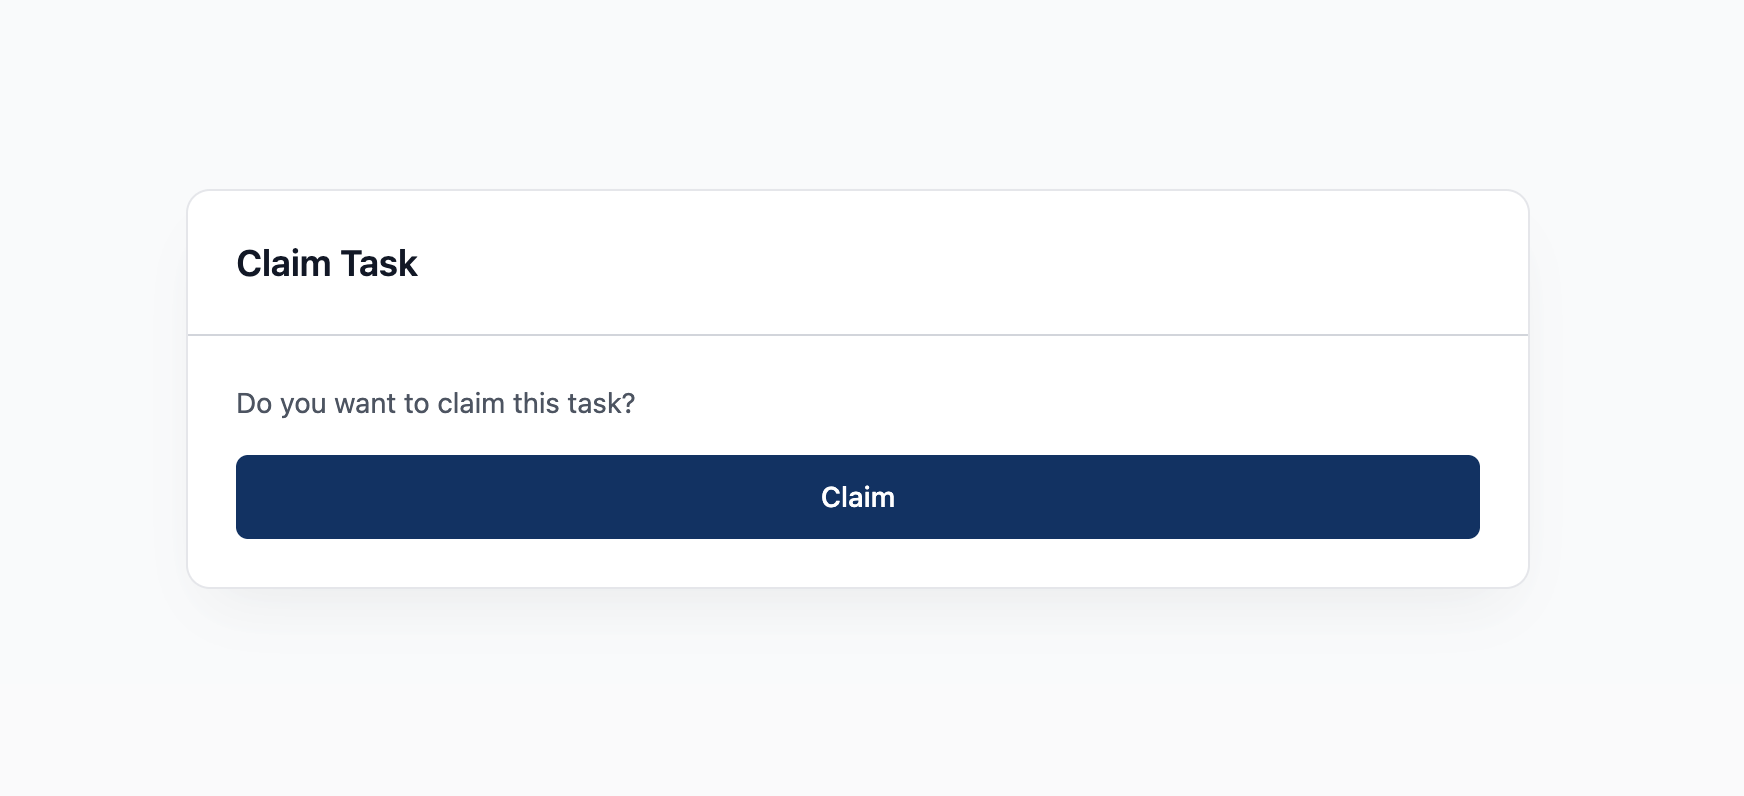
Claim the Task
You'll see the task details and a "Claim Task" button at the top.
Click "Claim Task".
Now the task is yours:
- Other agents can't claim it
- It shows in your queue
- The inactivity timer starts (you have 2 minutes to start working)
Part 2: Understanding What You See
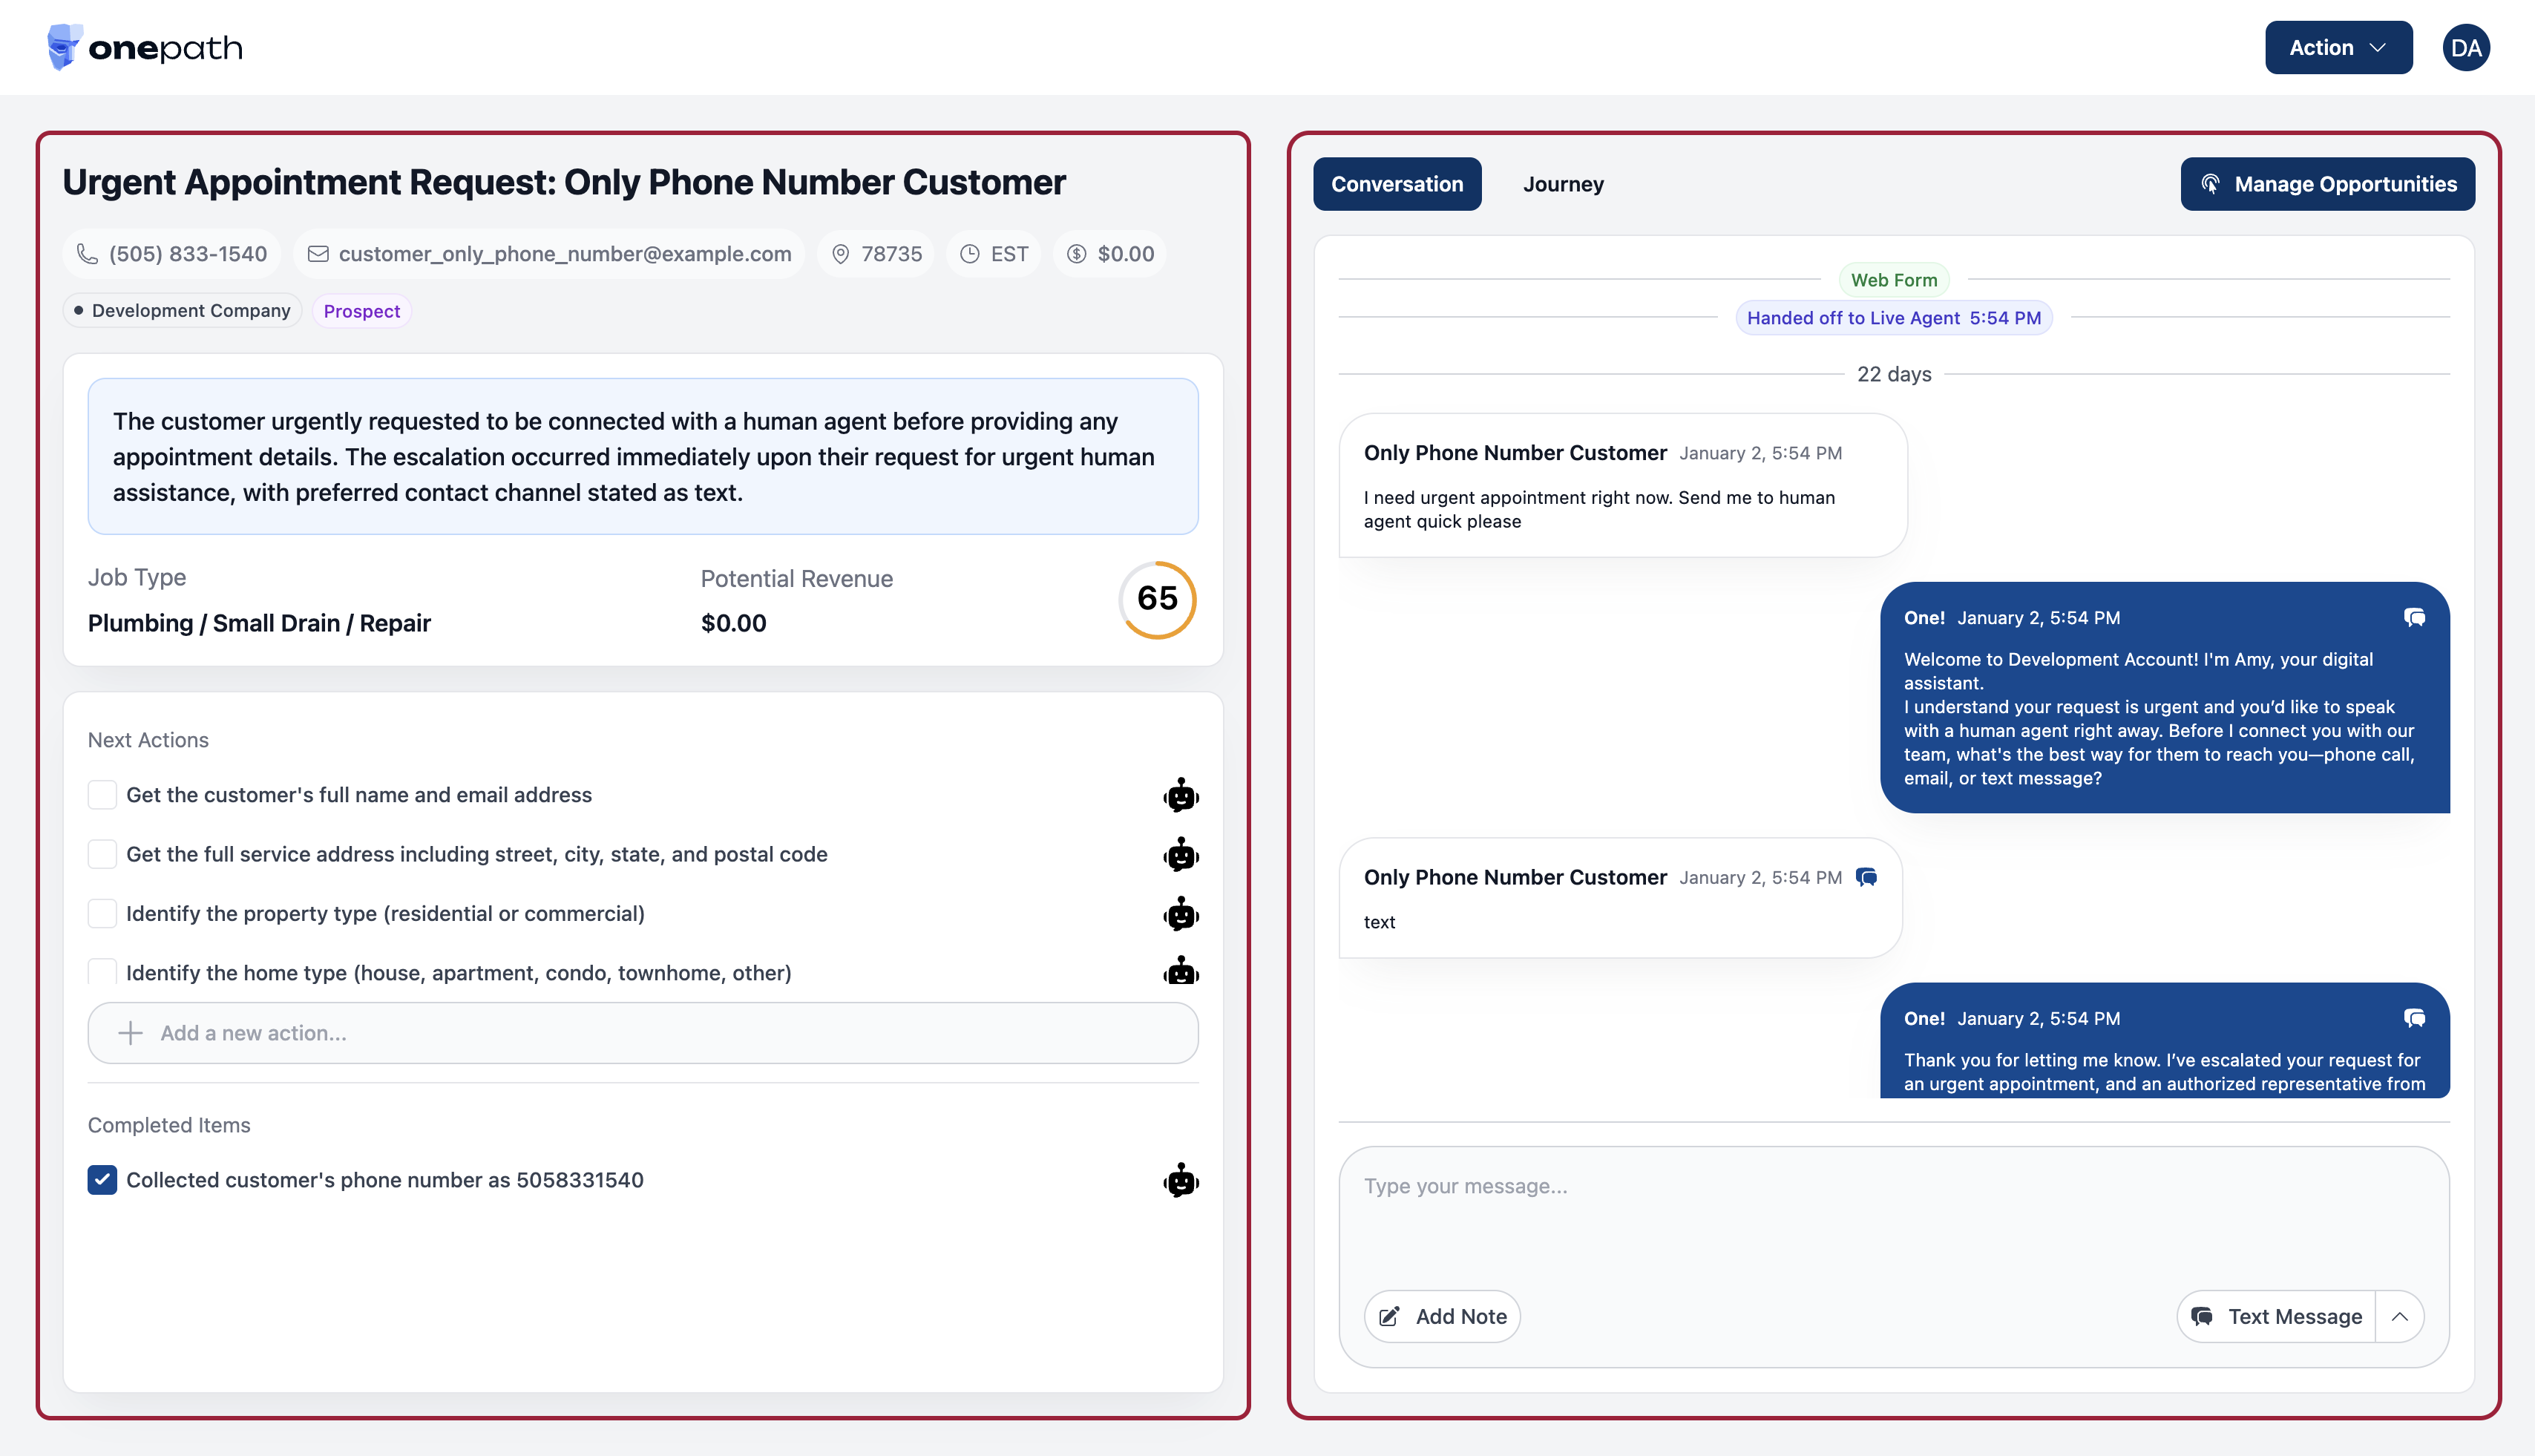
After claiming, you'll see a split-screen layout.
Left Side: Task Information
- Customer info - Name, phone, address
- AI Summary - What the customer needs (read this first!)
- Sub-tasks - Your checklist of things to do
- Notes - Previous notes from the system or other agents
Right Side: Conversation & Actions
- Conversation history - What's already been said
- Communication widget - Bottom right, for calling/texting/emailing
Part 3: Read Before You Act
Before contacting the customer, read:
- AI Summary - Tells you exactly what the customer needs
- Conversation history - What's already been discussed
- Sub-tasks - What you need to accomplish
Example AI Summary:
"Customer requested plumbing service for a clogged drain. Did not select a time slot. Needs to schedule an appointment."
Now you know: Call the customer and book an appointment.
Part 4: Contact the Customer
Find the Communication Widget
Look at the bottom right corner. You'll see a button (usually says "Text Message").
Click it to see your options:
- Call - Best for most tasks
- Text - Quick questions or confirmations
- Email - Detailed information
Make the Call
- Click Call
- Your browser asks for microphone permission → Click Allow
- The call connects
- Talk to the customer, solve their problem
First thing to say:
"Hi, this is [Your Name] calling from [Company]. I'm calling about your service request. Is this a good time?"
Part 5: While You're Working
Check Off Sub-Tasks
As you complete each item, click the checkbox next to it.
Example sub-tasks:
- ☐ Contact customer
- ☐ Confirm service needed
- ☐ Schedule appointment
- ☐ Confirm appointment details
Checking these off:
- Shows your progress
- Counts as activity (prevents timeout)
- Helps the next person if they need to take over
Add Notes
Click the Notes section and add what's happening:
Good note example:
"Called customer at 2:15 PM. Scheduled plumbing appointment for Tuesday 10 AM. Customer confirmed."
Why notes matter:
- If someone else gets this task later, they know what happened
- Helps account team if task gets escalated
- Covers you if there's a question later
Part 6: Finishing the Task
When you've helped the customer, it's time to close the task.
Option A: Resolve & Close (Most Common)
Customer is happy, problem solved.
- Click "Resolve & Close" button
- Select a reason:
- Booked Job - You scheduled an appointment
- Provided Information - You answered their question
- Issue Resolved - You fixed their problem
- Unsuccessful Contact - Couldn't reach them after trying
- Done! Task is closed.
Option B: Escalate
Can't solve it? Need help? Escalate the task.
Option C: Wait for Customer Response
Customer said "I'll call you back" or needs to check something?
- Click "Wait for Customer Response"
- Task goes on hold
- When they respond, it comes back to you (or another agent)
Part 7: What's Next?
Task is done. Now what?
- Check your email - Another task might be waiting
- Take a breath - You just completed your first task!
- Repeat - Same process for every task
If Something Goes Wrong
| Problem | What to Do |
|---|---|
| Customer is angry | How to Escalate |
| Call won't connect | Try text or email instead, then check troubleshooting |
| Don't know the answer | Tell customer you'll find out, then ask your supervisor |
| Inactivity warning popped up | Click "I'm still here" and keep working |
| Claimed wrong task | Click "Close" to return it to the queue |
Quick Reference
The flow:
- Email → Click link → Claim
- Read AI summary + conversation
- Contact customer (call/text/email)
- Check off sub-tasks as you go
- Add notes
- Resolve & Close
You've got this!