Web Scheduler
The Web Scheduler is the booking widget your customers use to request service from your website. This page is where you set up how it looks, where it runs, and what it shows.
Quick Answer - 30 Seconds
To set it up: Account → Channels → Web Scheduler → set your brand color, text color and logo → add the websites it appears on → Save & Continue. Choose what customers see under Templates further down this page.
What the Web Scheduler is
It's an embeddable widget that opens a step-by-step booking flow — request → address → schedule — right on your own site. You configure it here; your developer adds it to your website once.
Location: Account → Channels → Web Scheduler
→ Adding it to your site (script tag + trigger button): Web Widgets integration guide
Customize the look
A live Preview at the top of the page updates as you make changes.
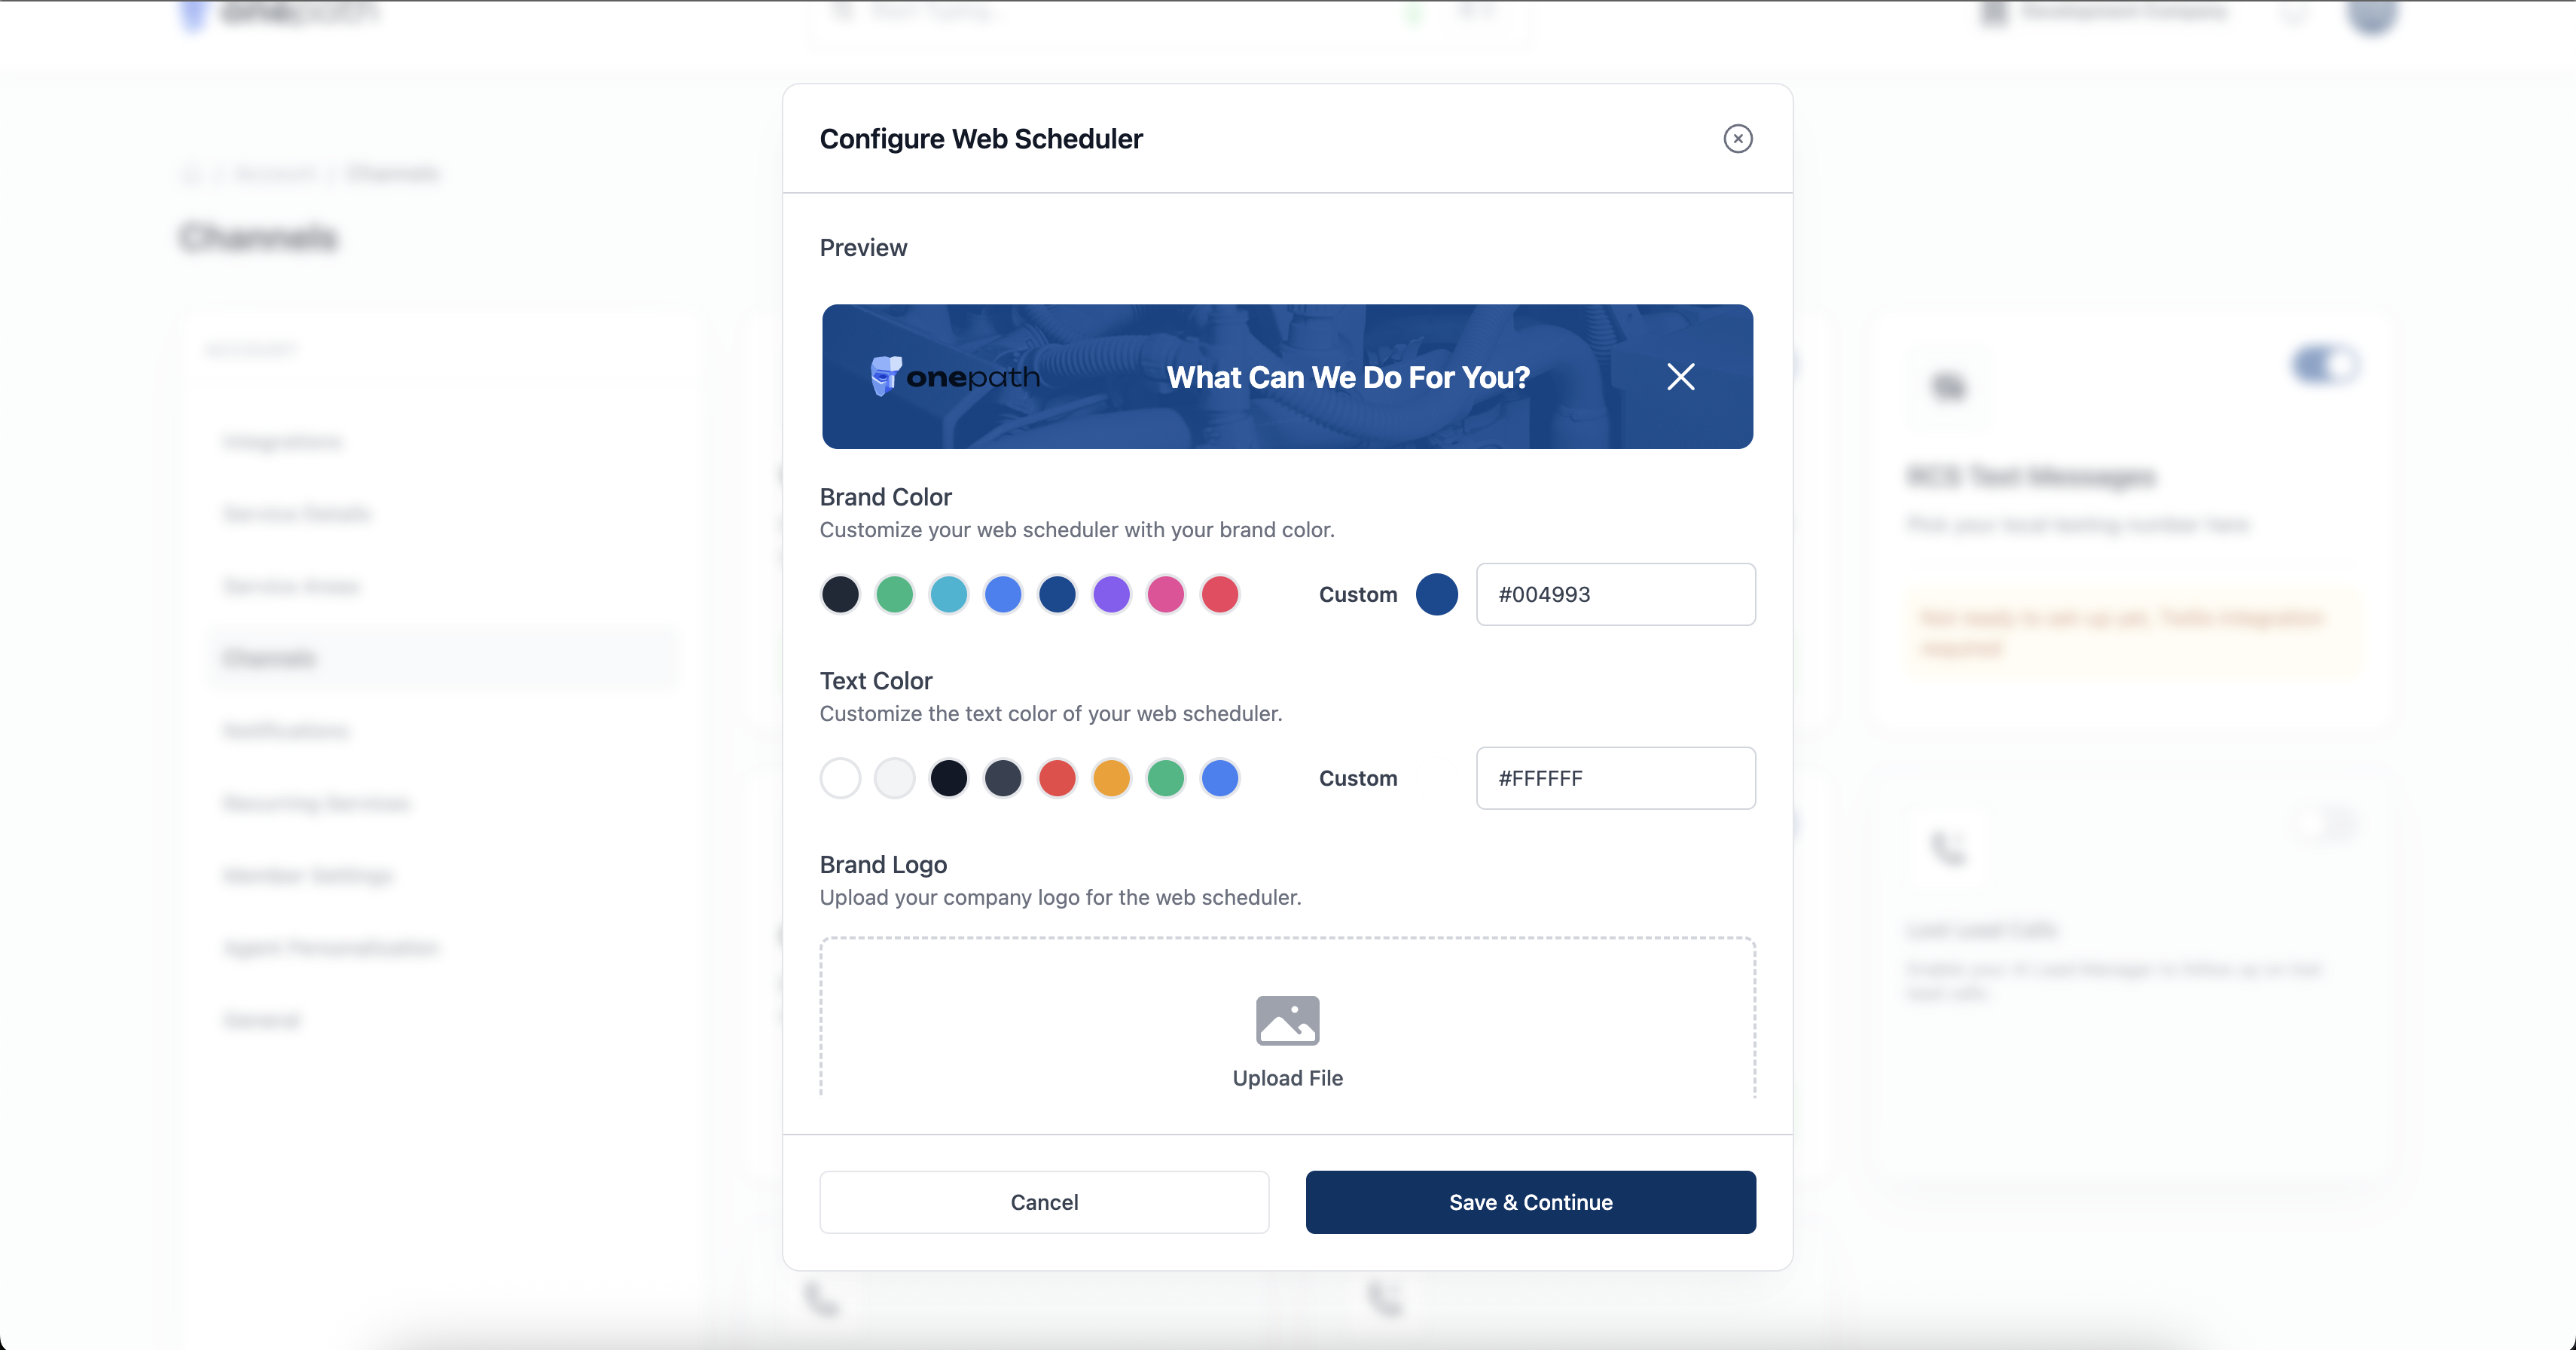
- Brand Color — pick a swatch or enter a custom hex. Used for buttons and highlights.
- Text Color — the color of text shown on your brand color.
- Brand Logo — upload your company logo to show at the top of the widget.
Where it appears
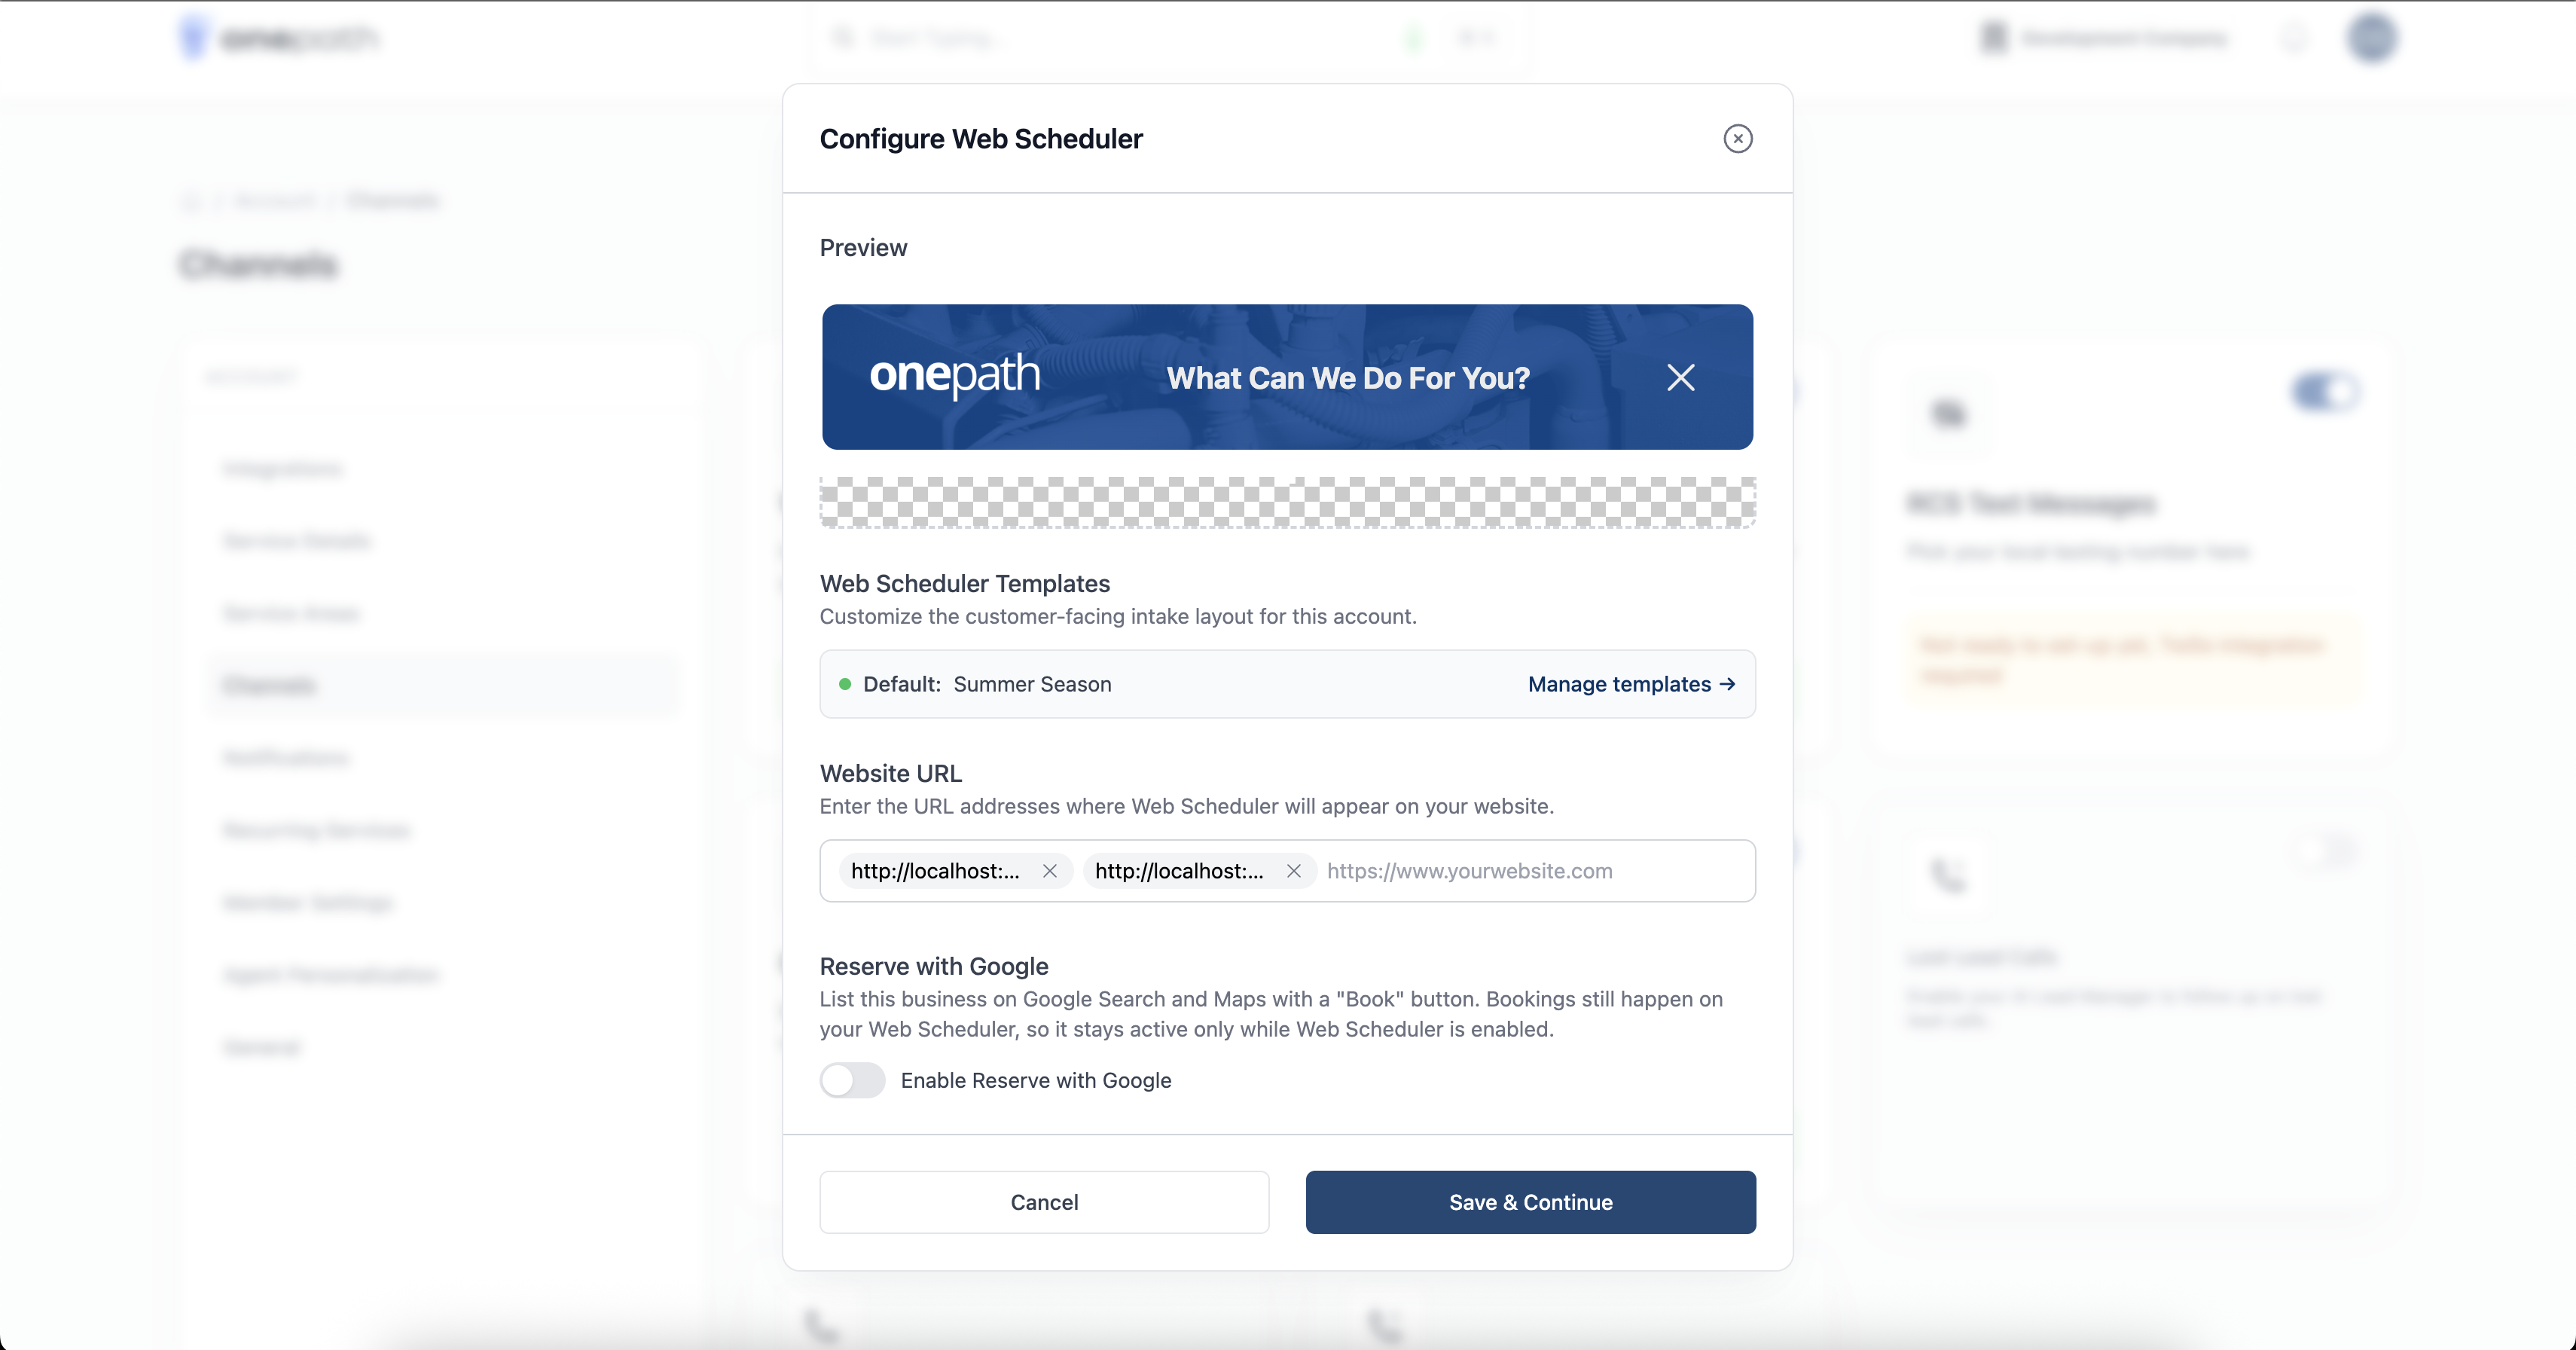
Under Website URL, list every address where the widget should load (for example https://www.yourcompany.com). The widget only runs on the sites you list here, so add each one before you go live.
Reserve with Google
Turn on Reserve with Google to list your business on Google Search and Maps with a Book button. Bookings still happen in your Web Scheduler, so this stays active only while the Web Scheduler is enabled.
When you're done, click Save & Continue to apply your Web Scheduler settings.
Templates
A template is the intake flow your customers walk through in the Web Scheduler. Use templates to choose what shows and in what order — not your prices, service names, or questions.
- Show or hide any category, trade, equipment, or service type.
- Reorder the options customers pick from.
- Switch the whole live layout in one click, or keep several templates ready.
You can't rename or add services here
Service names, pricing, and qualification questions come from your service catalog — not this editor.
- To change pricing, dispatch fees, on-site duration, or qualification questions, go to Service Details.
- To rename a service option or add a new service type, ask OnePath or your account manager. It's a catalog change, not self-serve.
- No services yet? You'll see "No services configured." Set them up in Service Details first, then come back.
Where to find your templates
On the Configure Web Scheduler screen, the Web Scheduler Templates section shows your default template with a Manage templates link — the quickest way in.
→ app.onepath.ai/account/channels/web_scheduler_templates
Your templates at a glance
The templates list shows one card per template.
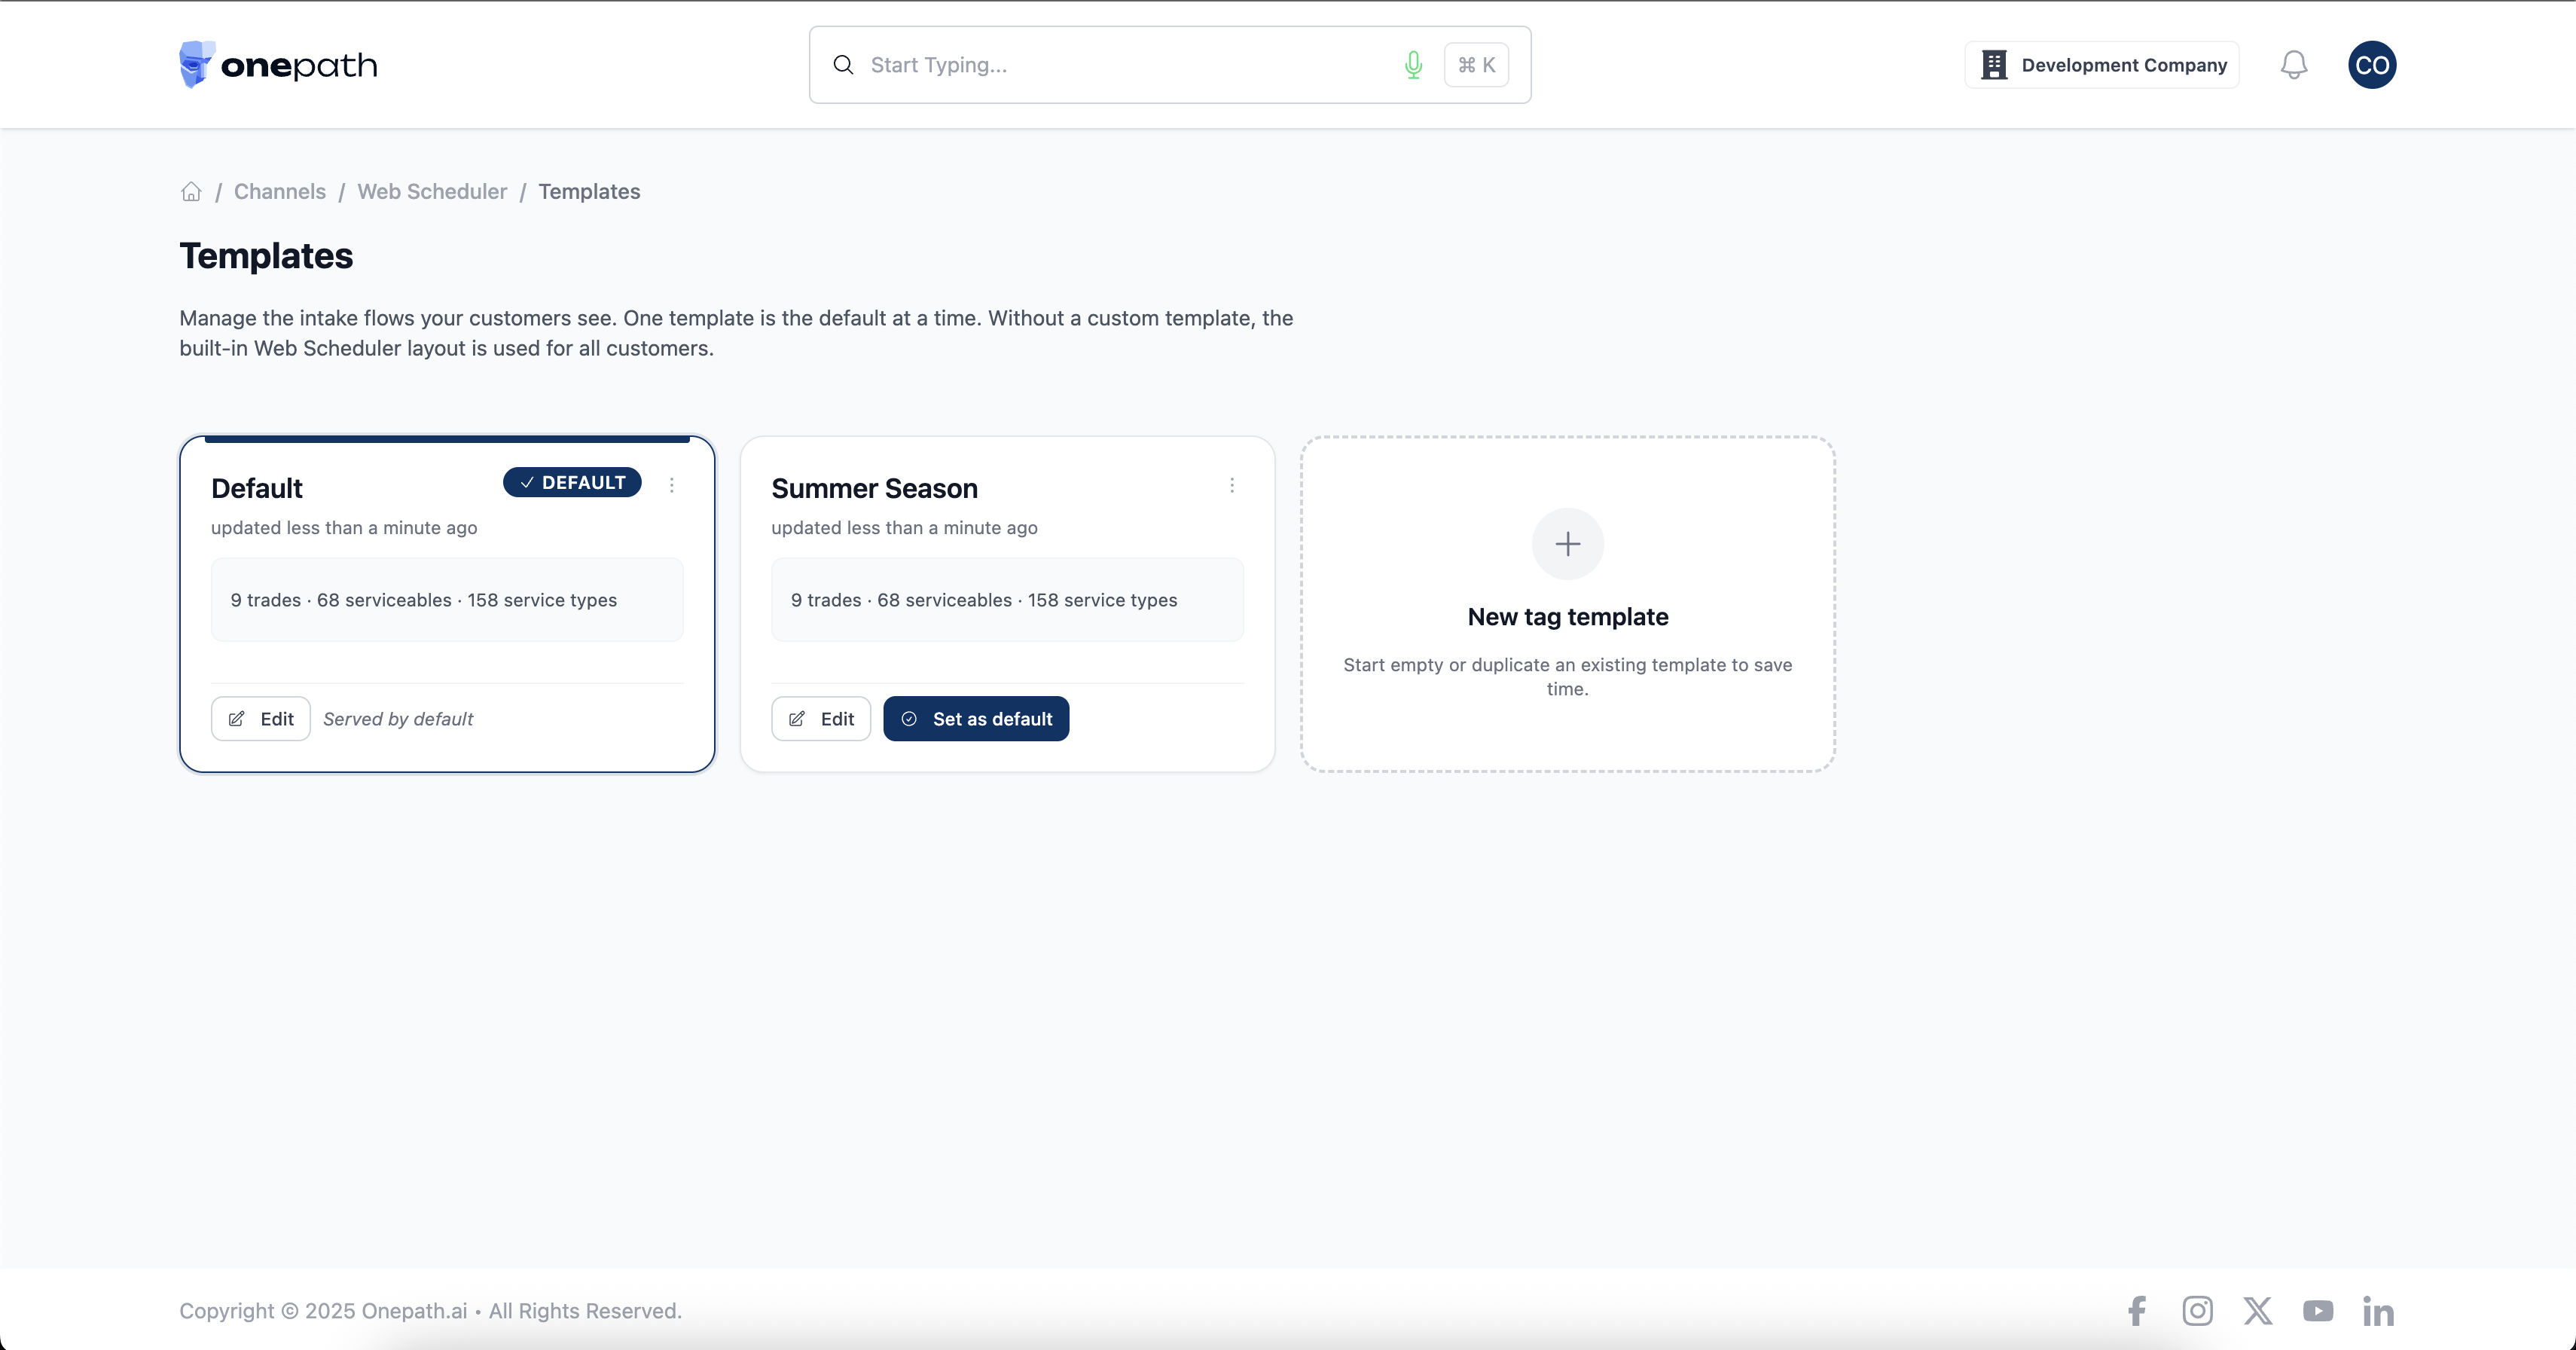
- The default template carries a Default badge and a Served by default label.
- The stats line (trades · serviceables · service types) tells you how much each template shows.
- The + New tag template card starts a new one.
- The ⋯ menu on each card holds Rename, Duplicate, and Delete.
Create a template
Click + New tag template, give it a name, and you land straight in the editor.
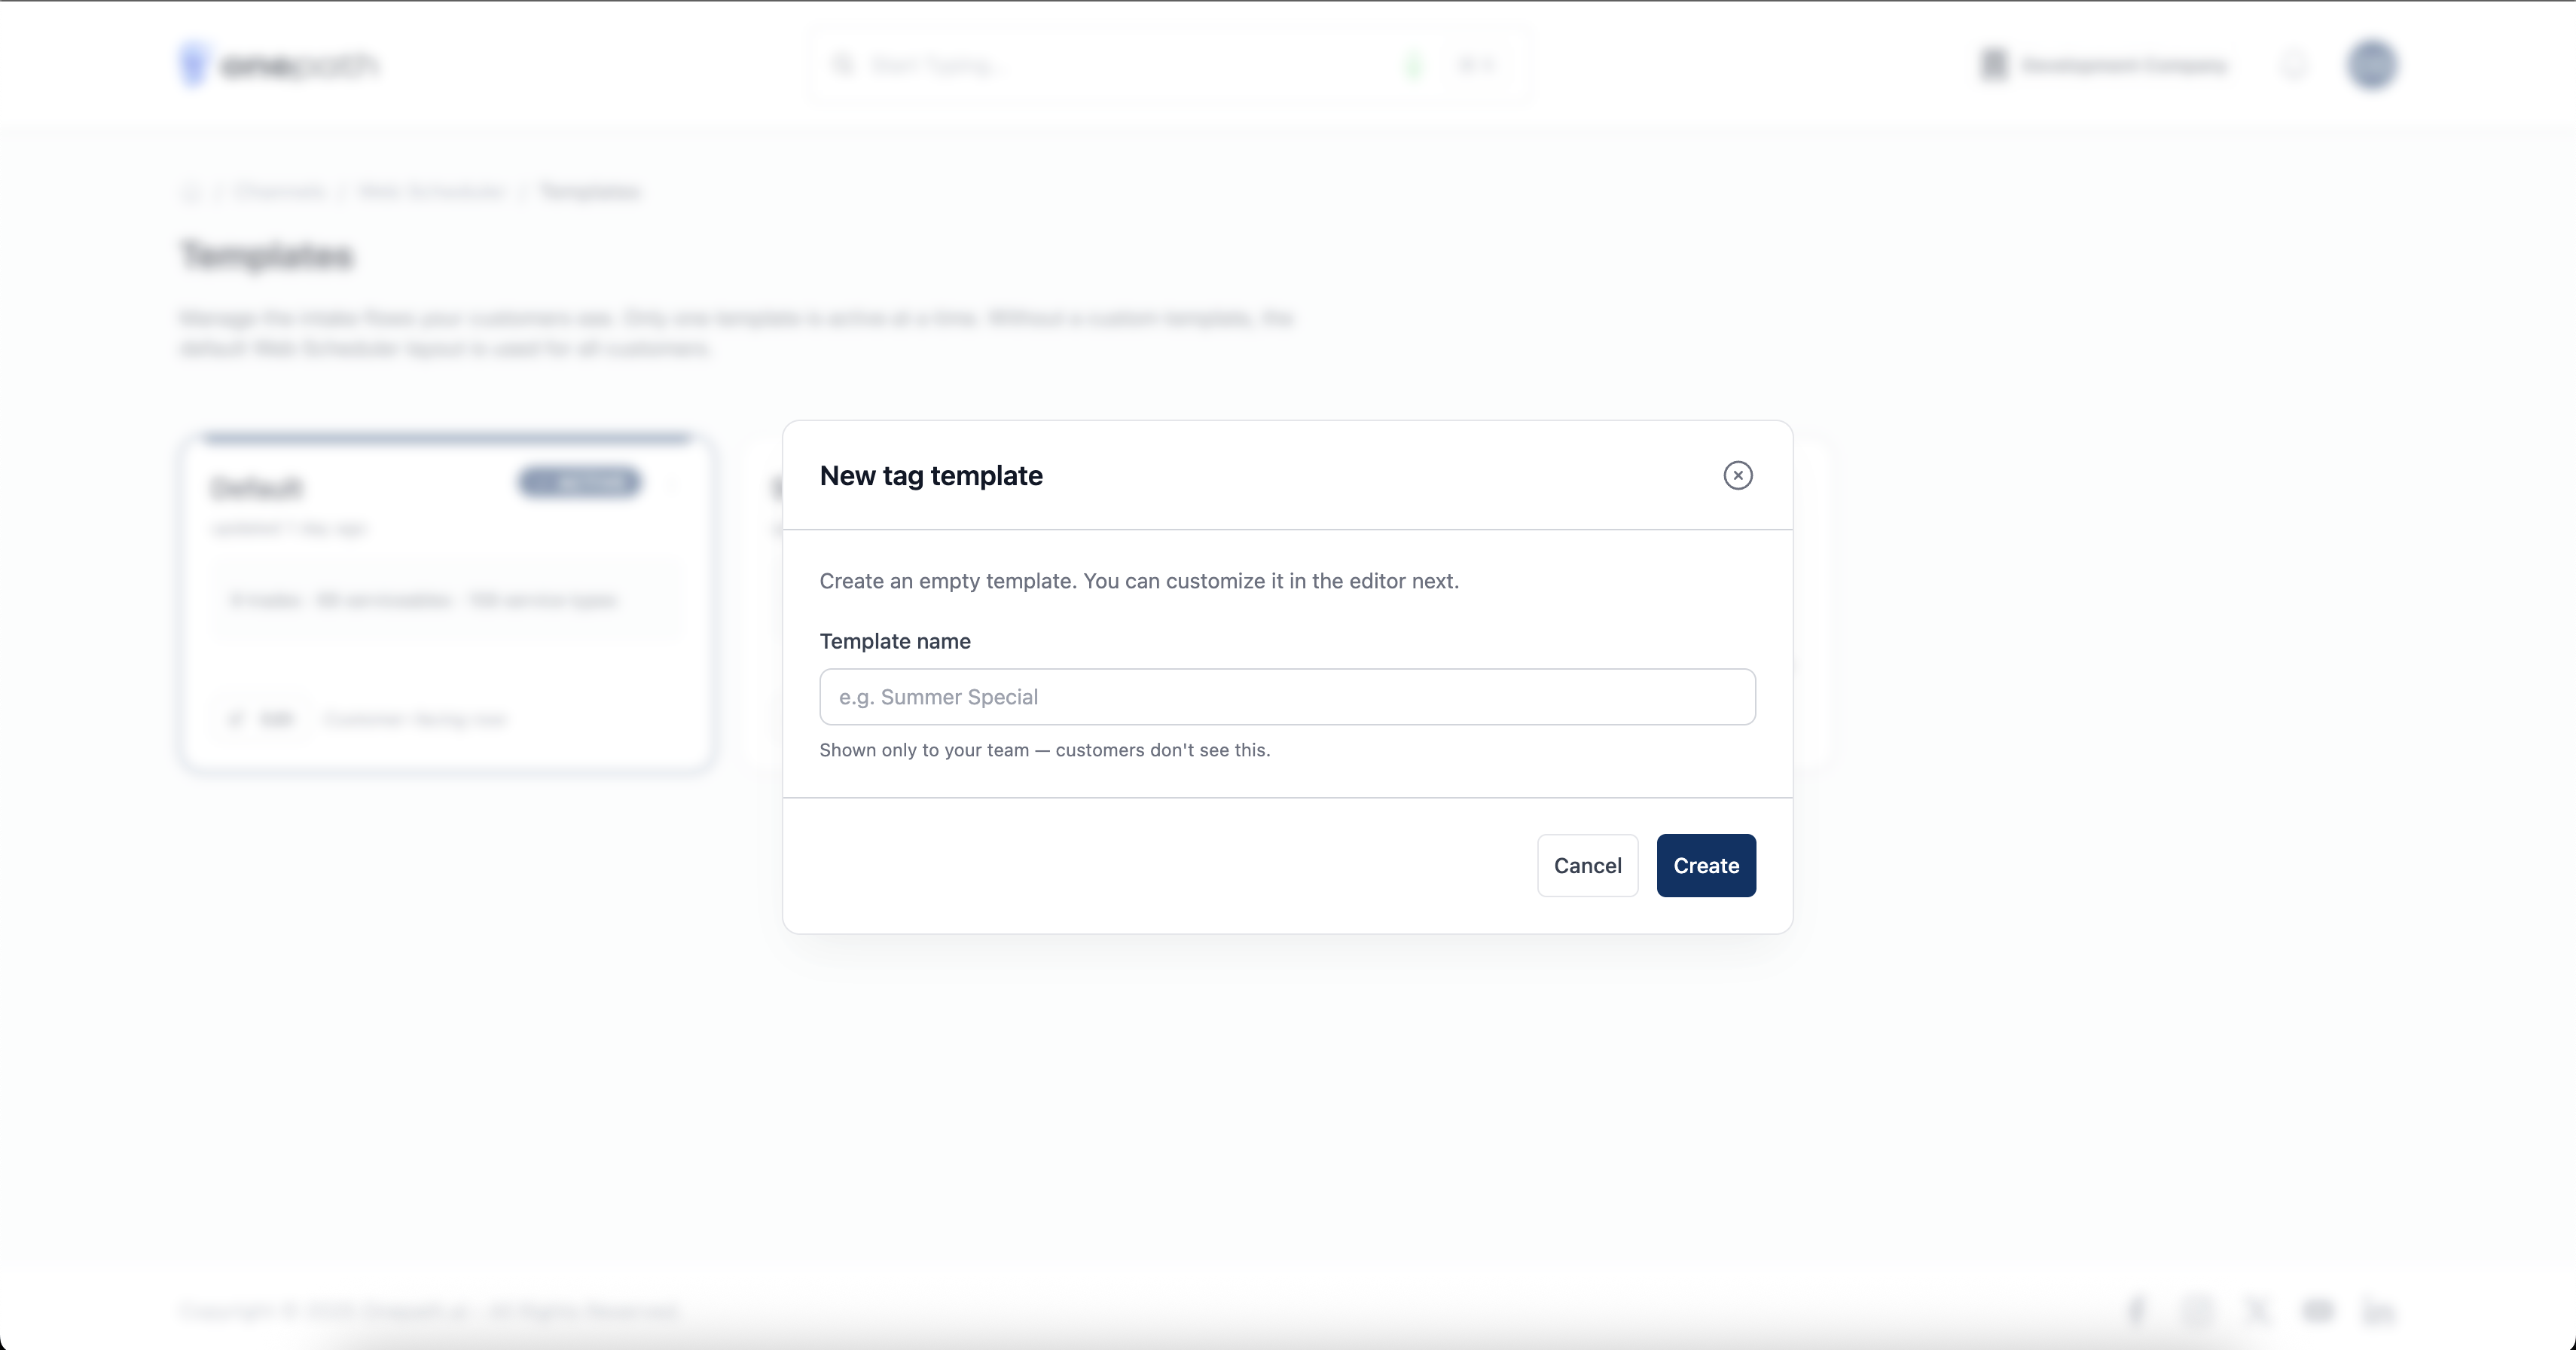
- The name is internal — it helps your team tell templates apart.
- Want a head start? Use Duplicate from a card's ⋯ menu to copy an existing template, then tweak the copy.
Customize the layout
Open a template to reach the editor. It shows a live preview of the customer's Web Scheduler.
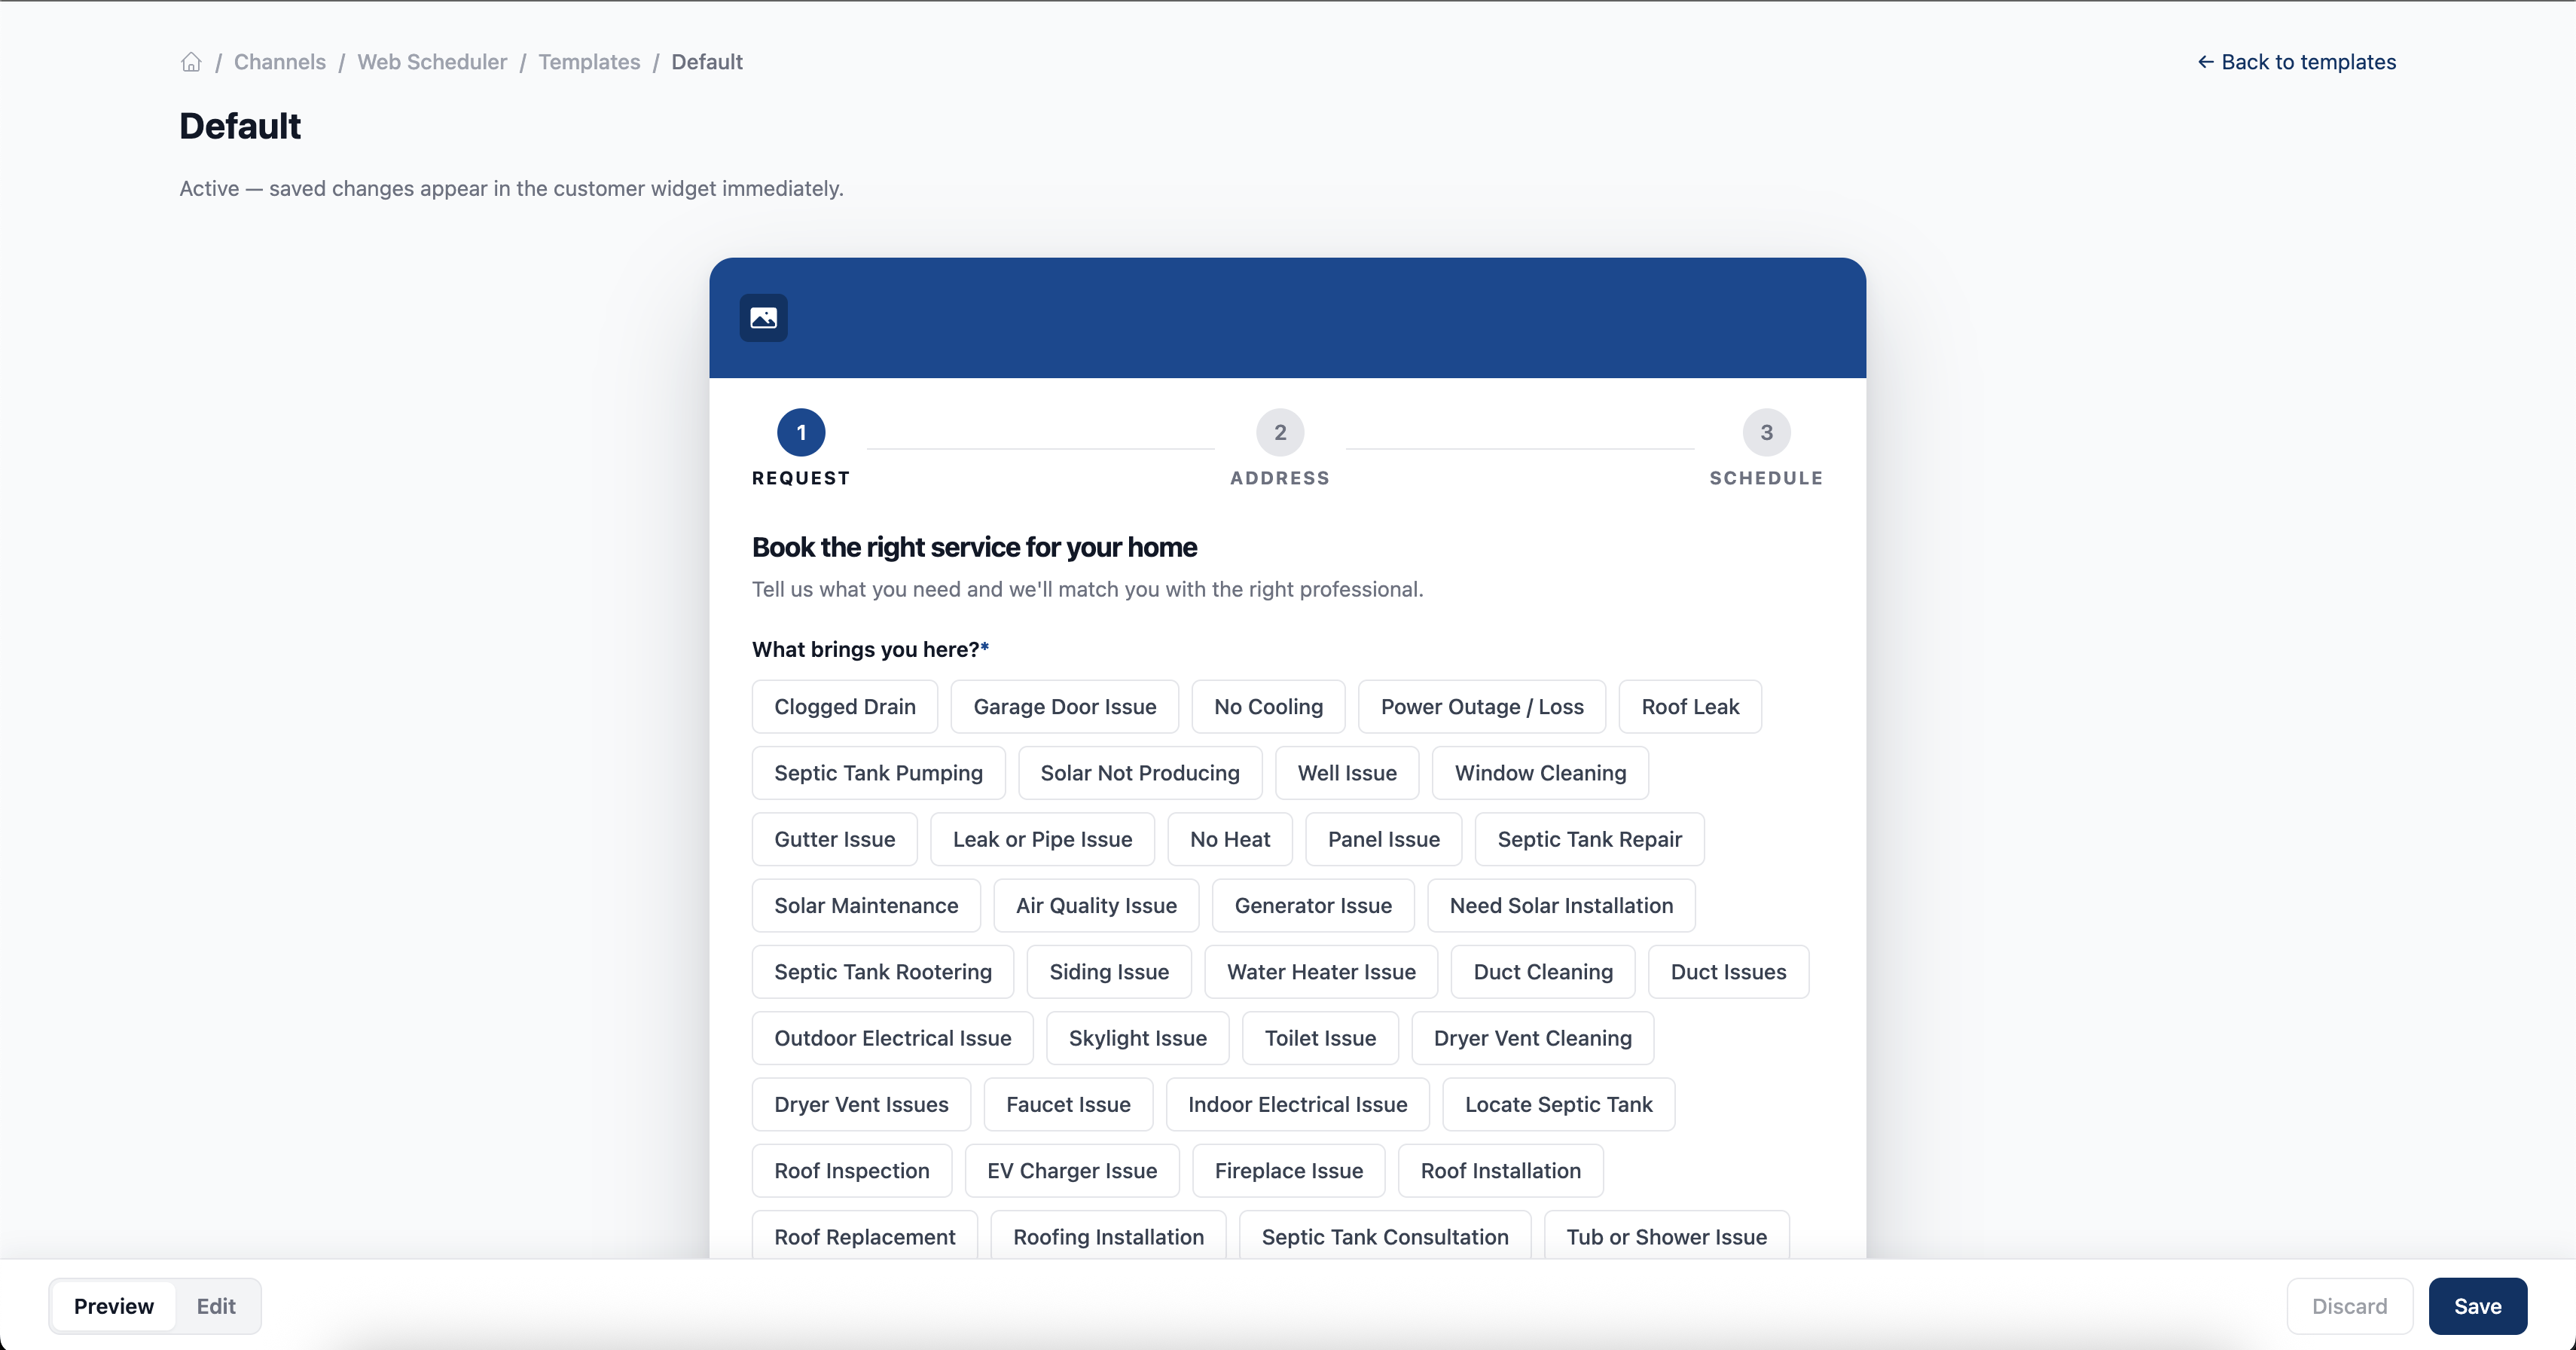
Switch the bottom bar from Preview to Edit to start changing things:
- Reorder — drag a chip by its handle (⋮⋮) into the order you want.
- Hide / show — click ✕ to hide an option, + to bring it back.
- The preview updates as you go, across all levels: categories → trade → equipment → service type.
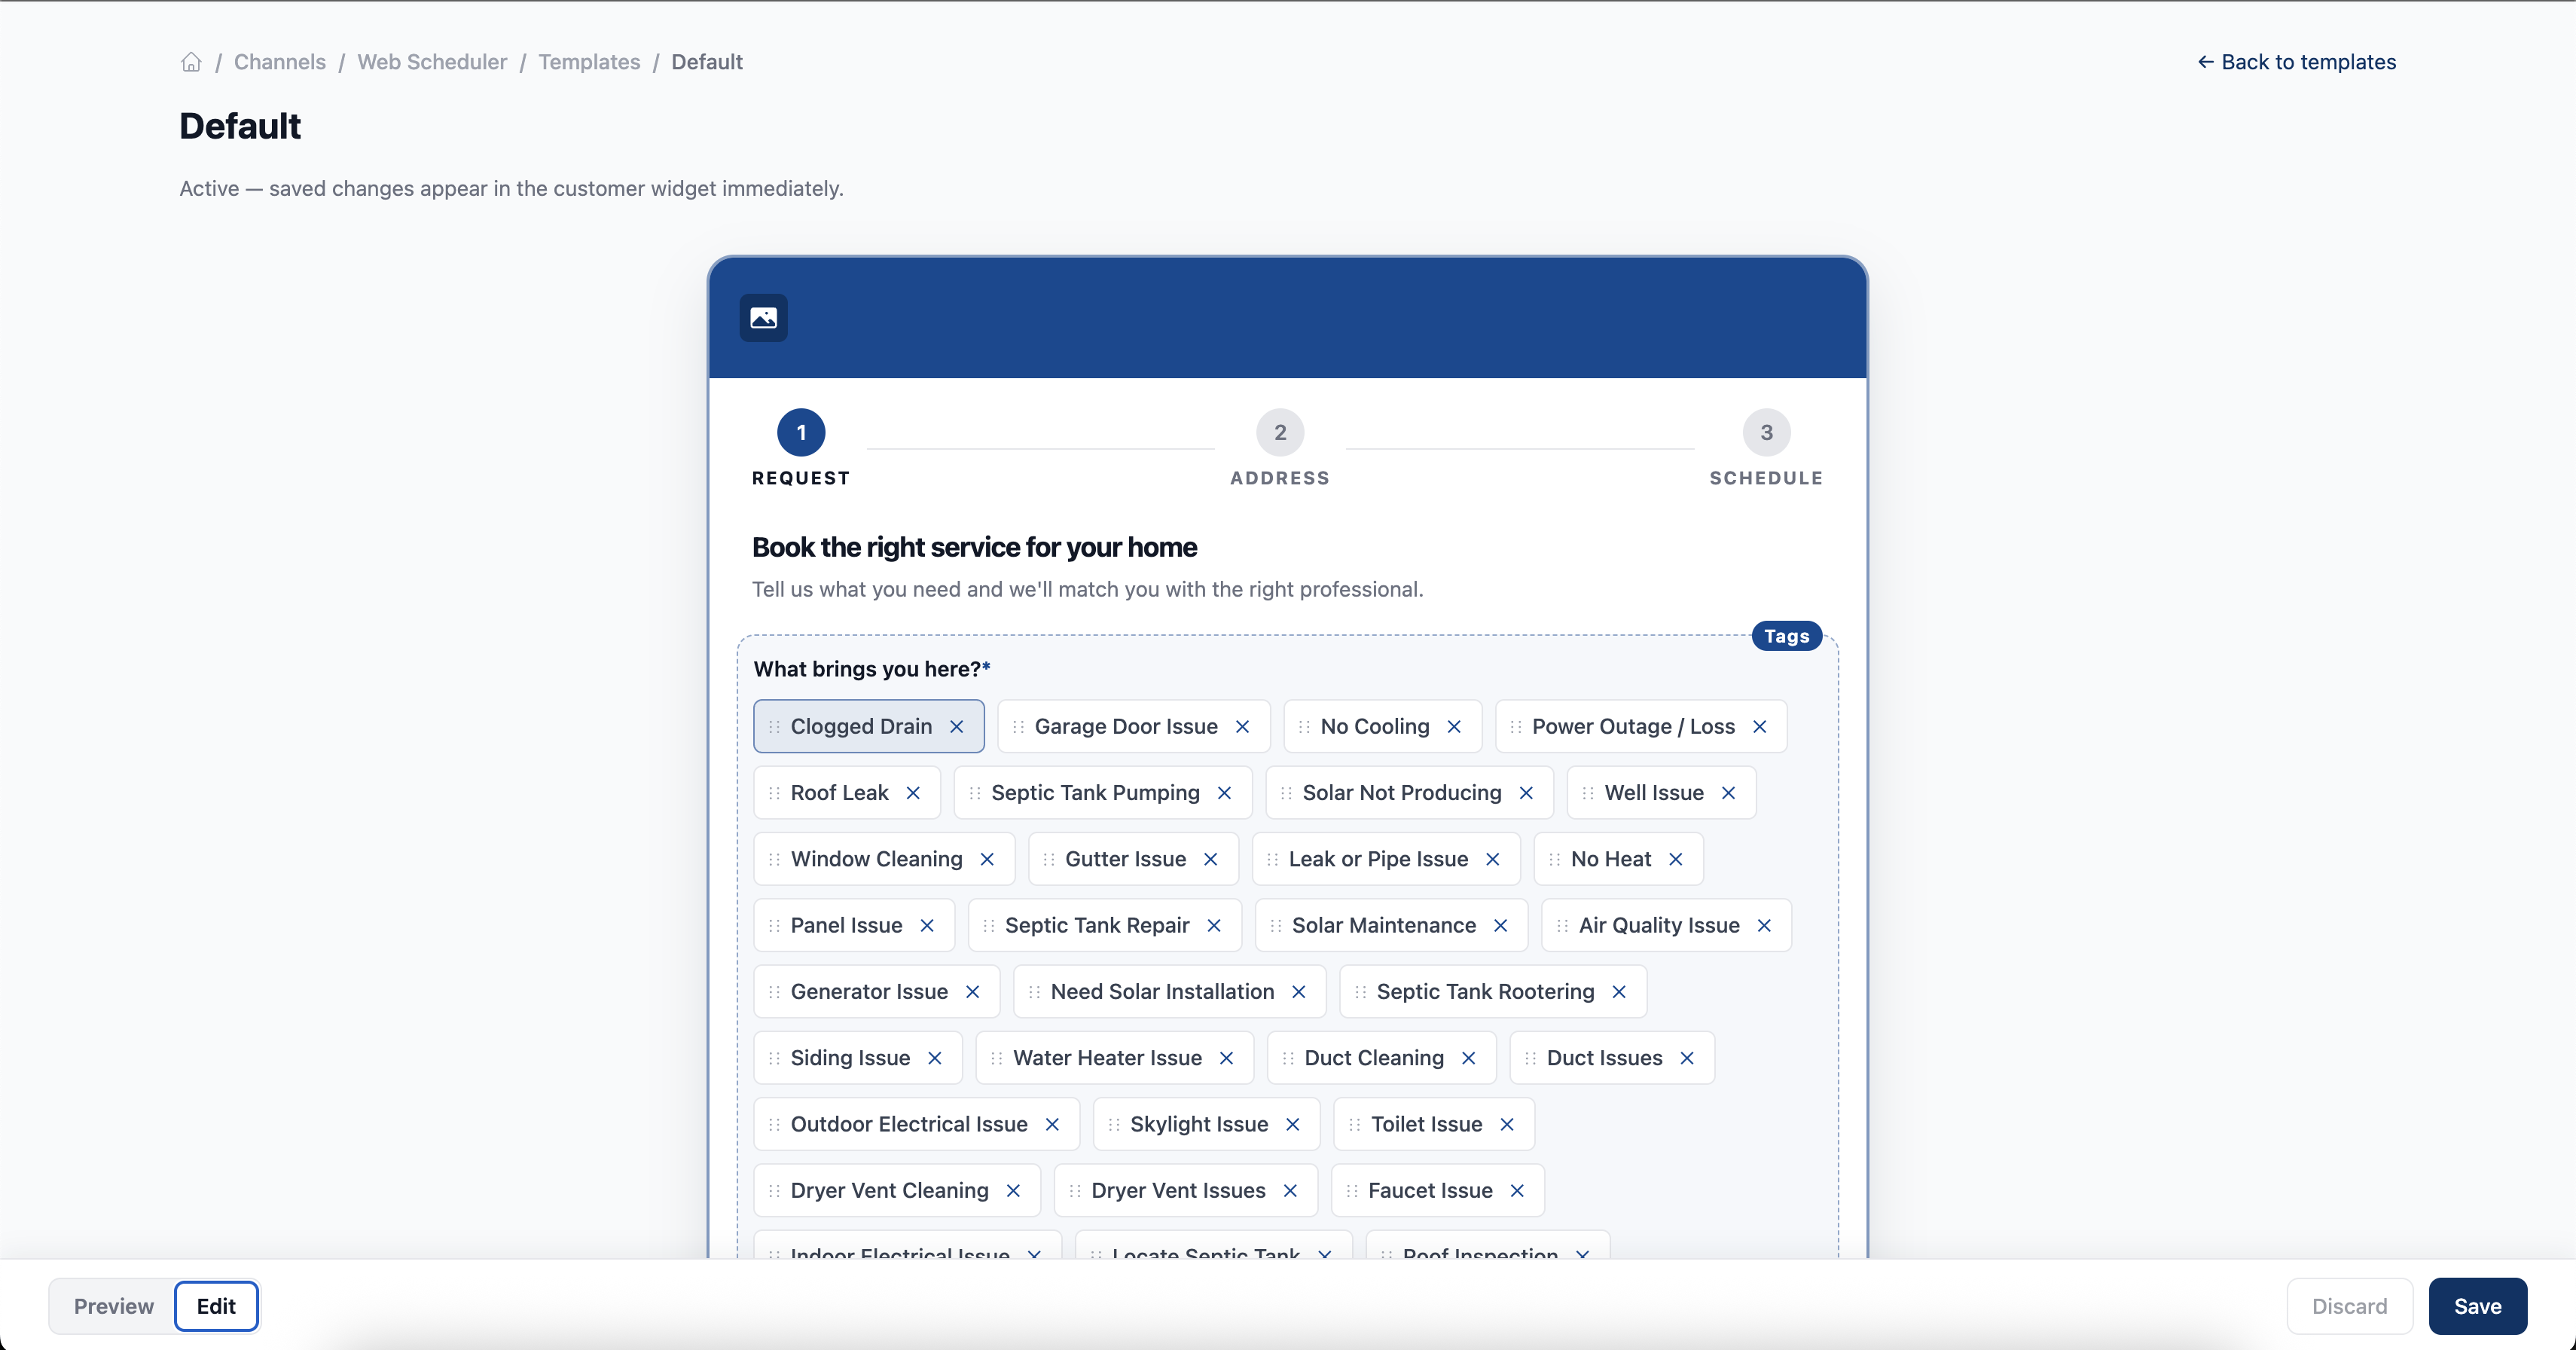
When you have changes, the bar shows Unsaved changes. Click Save to keep them, or Discard to roll back to the last saved version.
Make a template live
On the templates list, click Set as default on the template you want.
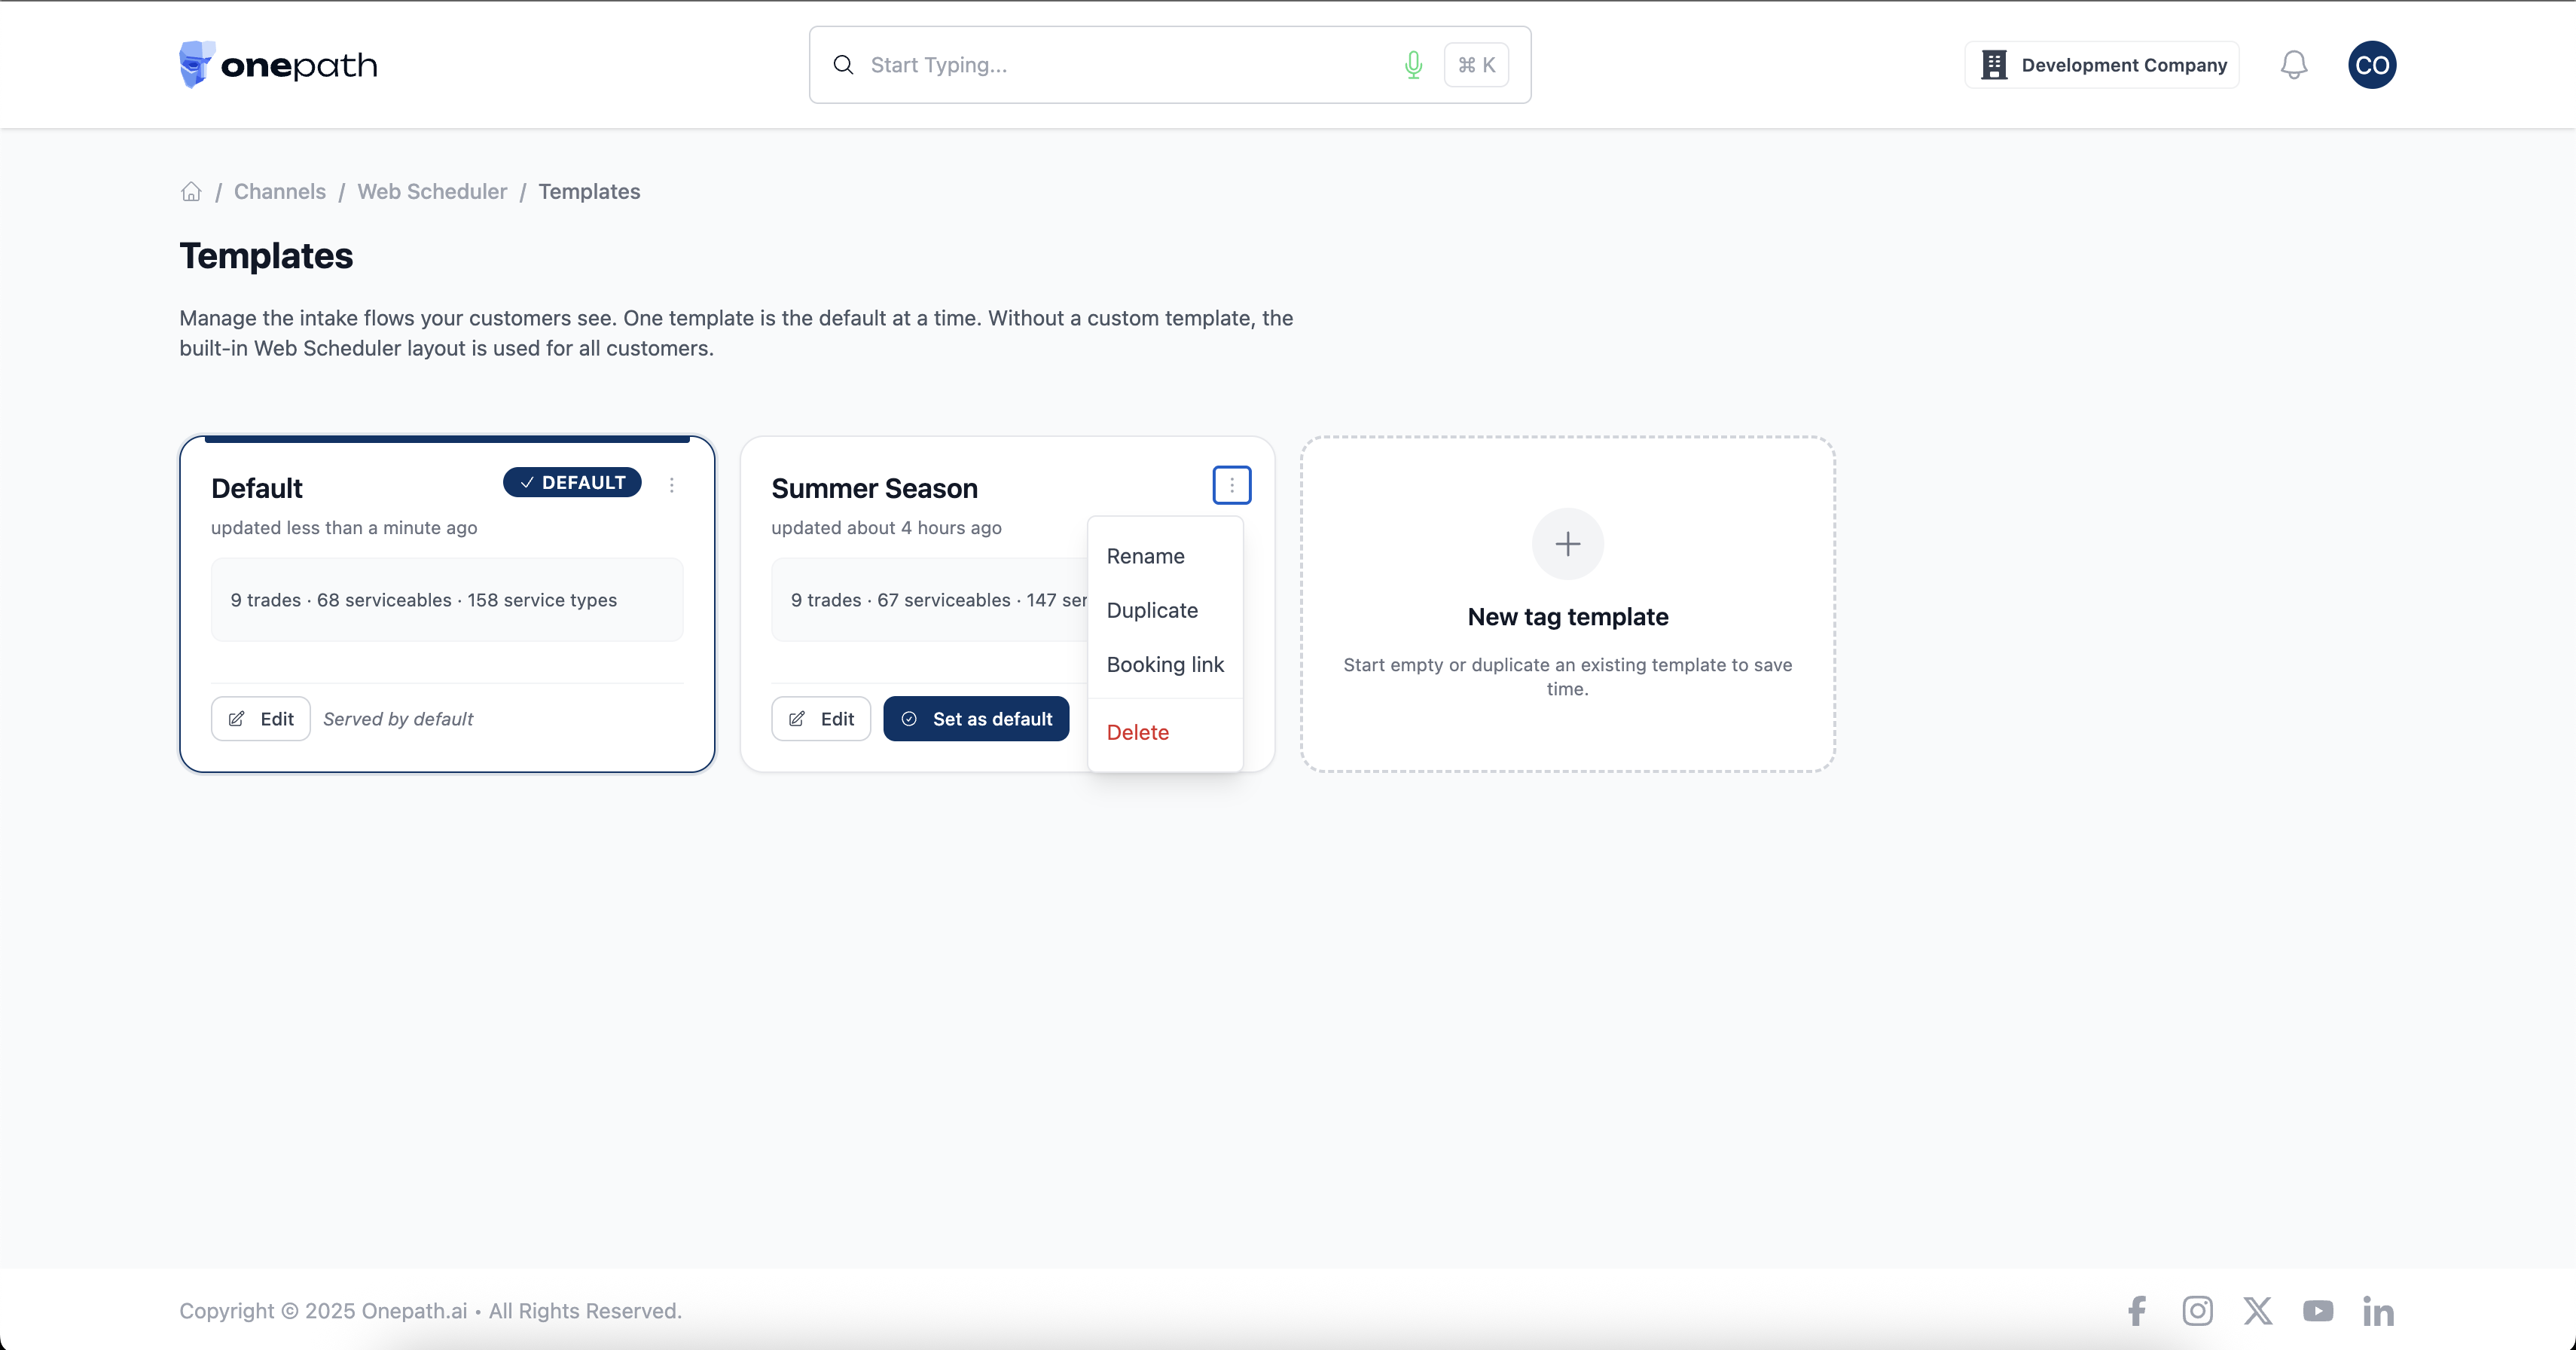
- Only one template is the default at a time — setting a new default replaces the previous live layout.
- The change reaches customers immediately.
Rename, duplicate, delete
All three live in the card's ⋯ menu.
Two templates you can't delete
You can't delete the default template (set another as default first), and you can't delete your last template (every account keeps at least one).
Share a booking link
Every template has its own link that opens the booking page with that template already loaded. In a card's ⋯ menu, click Booking link to copy it to your clipboard.
- Paste it into a campaign, an email, or a button on your site to send customers straight into that intake flow.
- It works for any template — so you can point a campaign at a seasonal template without making it the default.
The link ends with the template's slug:
https://book.onepath.ai/your-company/schedule?onepath_template=summer-season
"Some routes are unreachable"
If your default template hides options that were the only way to reach a service, a yellow banner appears at the top of the list.
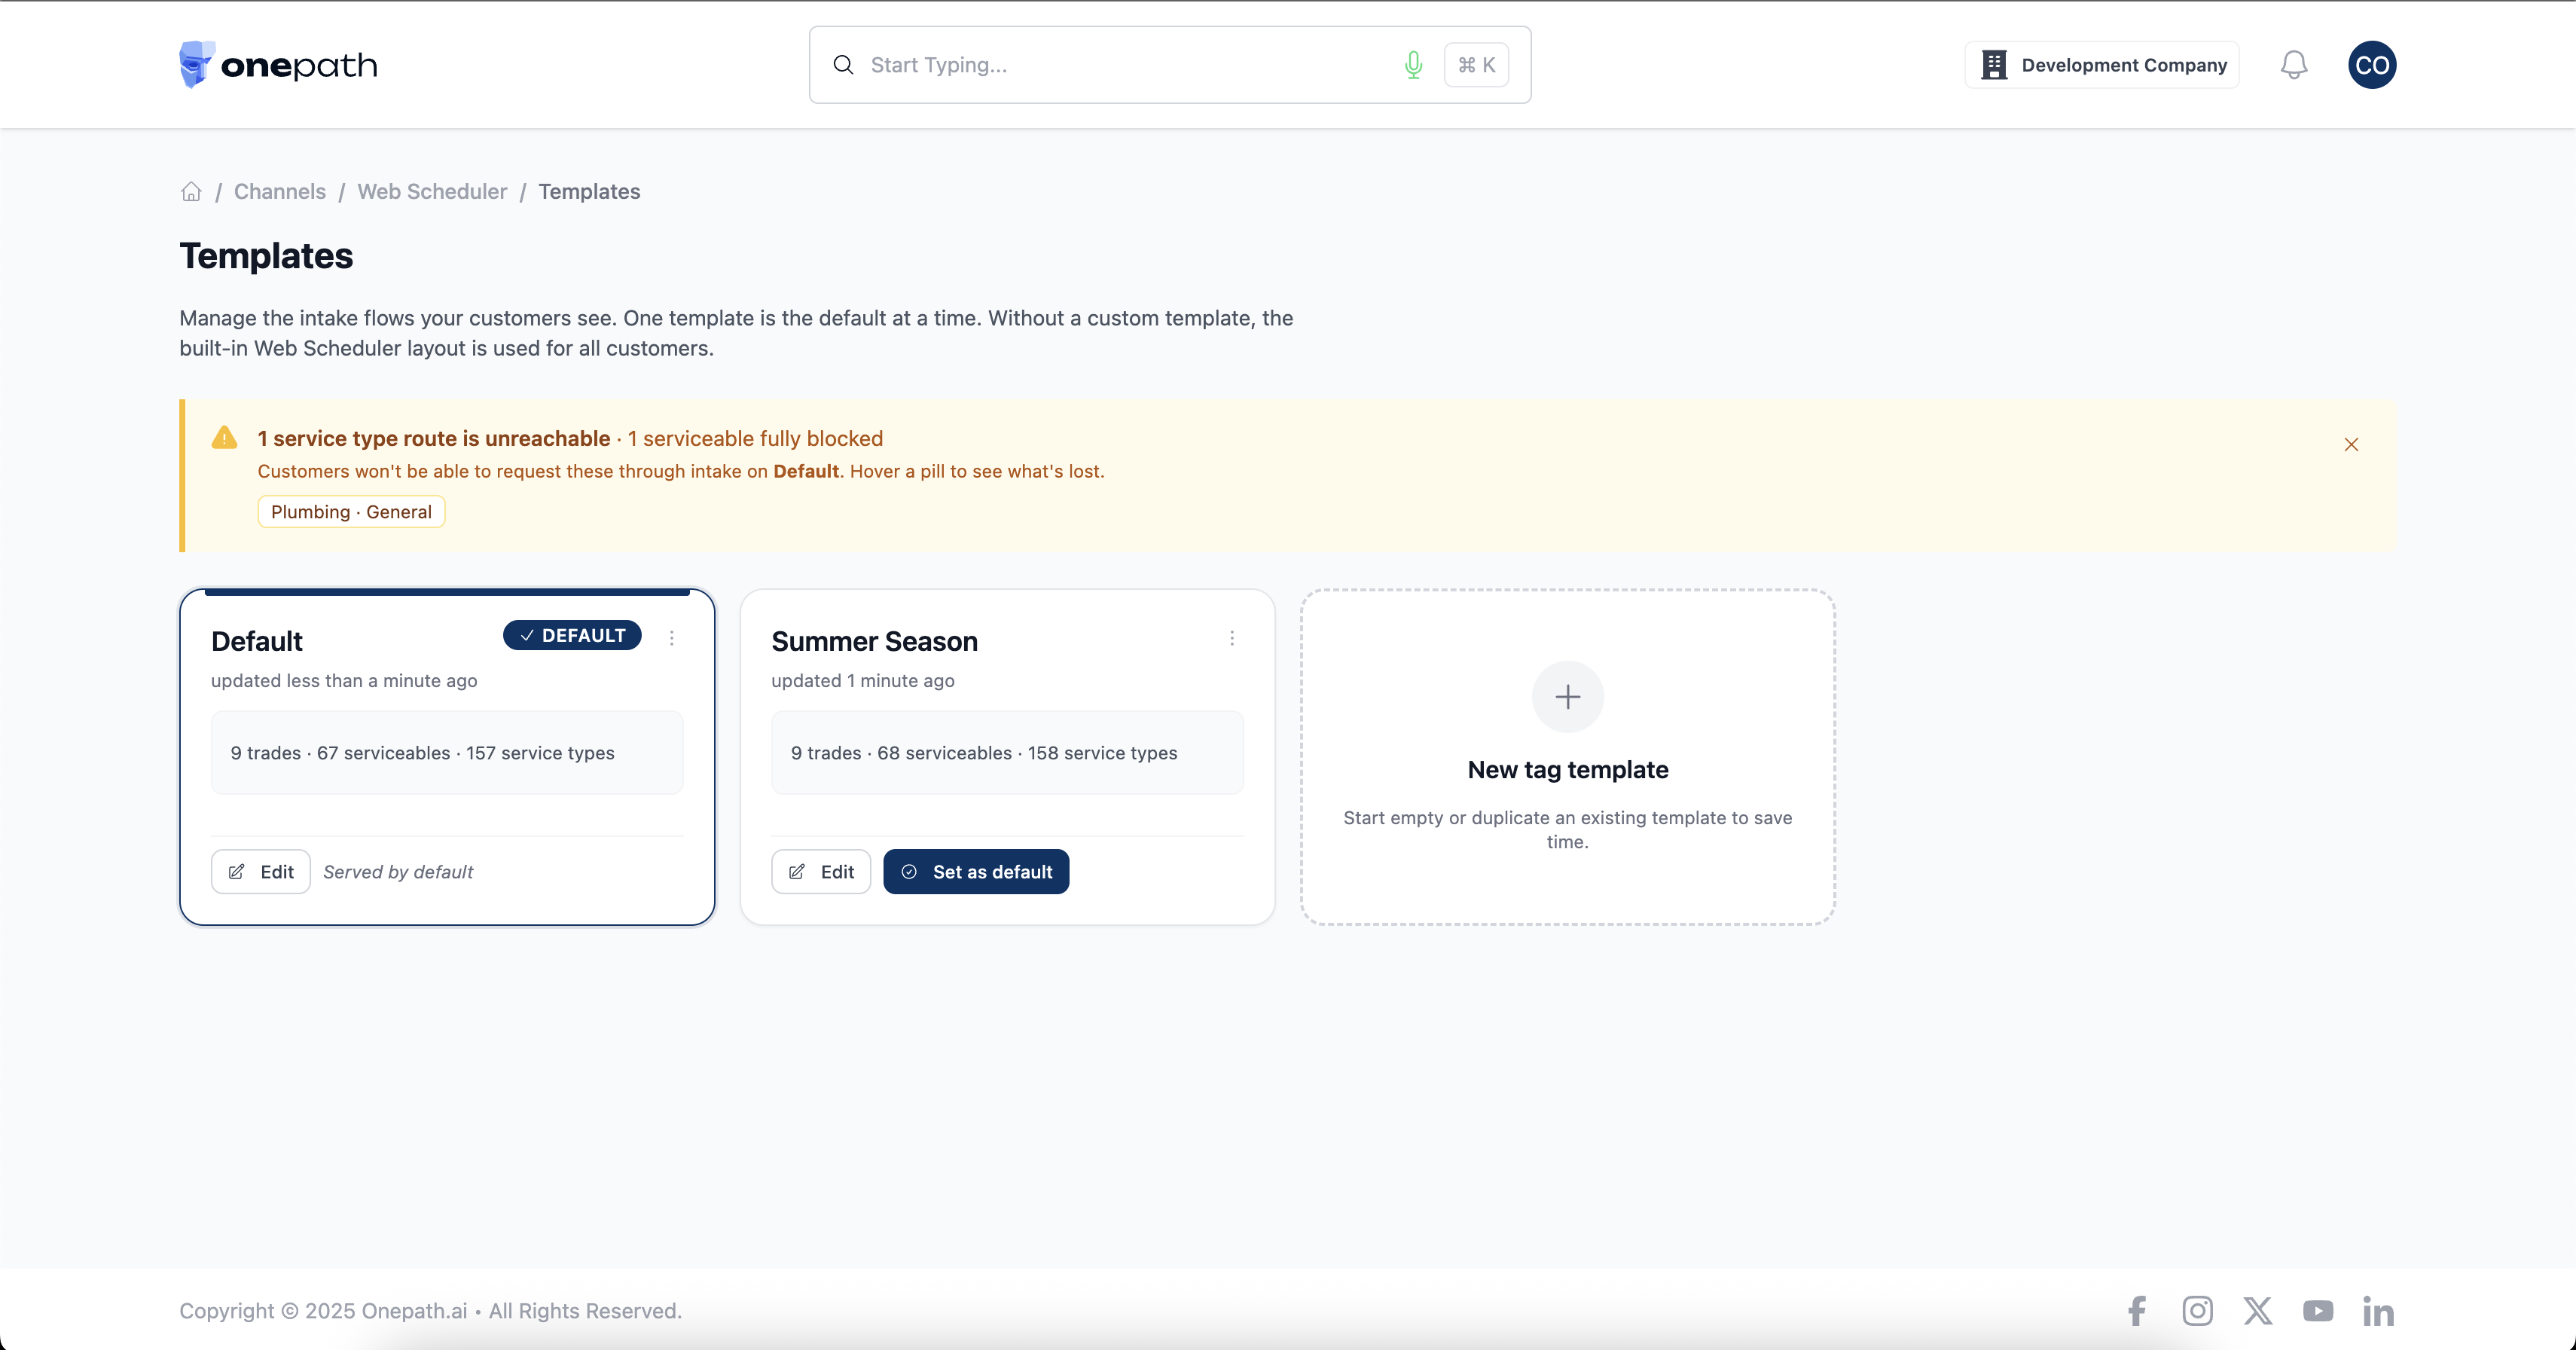
- Each pill names an affected service. Hover it to see what's lost and what's still available.
- To fix it, open the template and show the options you hid (or set a different template as default).
Quick Tips
- ✅ Add every website — the widget only loads on the URLs you list.
- ✅ Only one template is the default — setting a new default swaps the customer-facing layout instantly.
- ✅ Template names are internal — customers never see them.
- ✅ Hiding isn't deleting — a hidden option stays in the template, ready to switch back on.
- ❌ You can't rename or add services here — those are catalog changes; ask OnePath.
Still stuck?
Reach out in your OnePath Slack channel or email your account manager. Include the template name so we can help fast.